
JPEG is the most common type of image used on the web, and with good reason: for decades, JPEG has almost invariably been the right choice for encoding photographs. The use case is right there in the name: JPEG stands for "Joint Photographic Experts Group," the committee responsible for first issuing the standard in 1992. You'll see the file extension for a JPEG as either .jpg or .jpeg, though the latter is rare in modern usage.
While lossless compression passively compresses image data as best it can, JPEG's lossy compression looks for opportunities to make the compression more efficient with tiny, often imperceptible alterations to the image data. JPEG encodes image data as eight-by-eight blocks of pixels and describes the blocks—not the individual pixels inside them—algorithmically.
It may sound like an academic distinction on paper: "GIF uses a grid made up of pixels versus JPEG uses a grid made up of smaller grids of pixels." In practice, this use of blocks rather than pixels means JPEG is well suited to a much more common use case for images: the kind of subtle, layered gradients that make up a real world photograph.

Describing even a very simple single-pixel gradient using GIF-style encoding would be extremely verbose:
Row one, columns one through nine are #00CC00. Row one, column ten is #00BB00. Row one, column eleven is #00AA00. Row one, column twelve is #009900. Row one, column thirteen is #008800. Row one, column fourteen is #007700. Row one, column fifteen is #006600. Row one, column sixteen is #005500.
Describing a gradient using JPEG-style encoding is much, much more efficient:
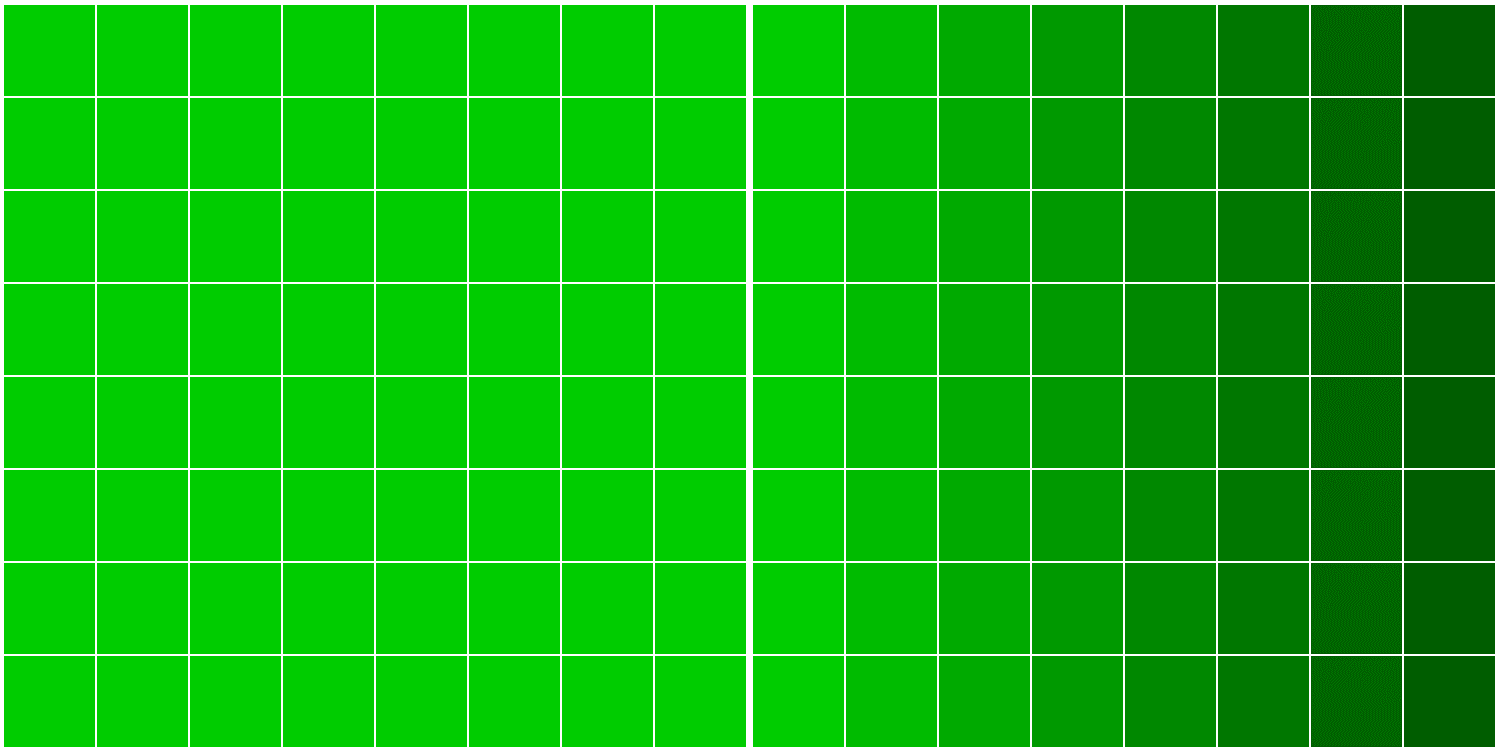
Block one is #00CC00. Block two is a gradient from #00CC00 to #005500.
Where JPEG really shines is in quantizing the level of "high frequency" detail in an image, often imperceptibly. As a result, saving an image as a JPEG usually means reducing the quality of that image in ways that are measurable, but not necessarily visible. As you've learned, GIF-style palette quantization is a relatively simple operation: reducing the number of colors in an image results in smaller files, but in a way that can be easy to spot with the human eye.
JPEG, on the other hand, is clever about how quantization is performed: JPEG's lossy compression attempts to quantize an image source in a way that loosely matches the way our own psycho-visual systems quantize the world around us. In effect, JPEG tries to throw away details we weren't likely to see in the first place, so it can sneak additional compression past us.
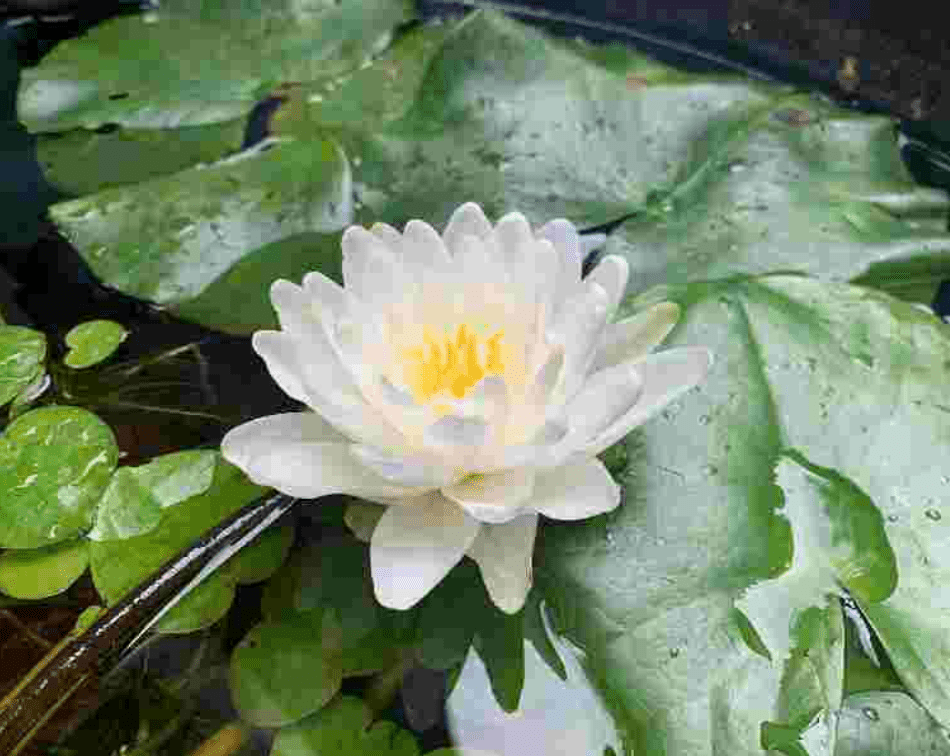
The human psycho-visual system does a great deal to "compress" the images you're constantly taking in. When I glance outside at my tiny garden, I can immediately process a huge amount of information: for example, individual brightly-colored flowers stand out. I register right away that the soil is a dusty gray, and the leaves are drooping—my plants need water. What I do see, but don't fully process, are the exact shape, size, angle, and shade of green for any of the individual dropping leaves. I can actively look for that level of detail of course, but it would simply be too much information to take in passively, and to no real benefit. So my psycho-visual system does a little quantization of its own, distilling that information to "the leaves are drooping."
In effect, JPEG works the same way. JPEG's lossy compression reduces the level of detail in an image in a way that might not register at all to our naturally "lossy" psycho-visual systems, if done within reason—and introduces far more opportunities for bandwidth savings than lossless compression alone.
For example, JPEG takes advantage of one of our major psycho-visual weaknesses: our eyes are more sensitive to differences in brightness than differences in hue. Prior to applying any compression, JPEG uses a process called "discrete cosine transformation" to split the image into separate frequencies—"layers," in a manner of speaking—representing luminance (brightness) and chrominance (color), or "luma" and "chroma."
The luma layer is minimally compressed, discarding only small details that aren't likely noticeable to the human eye.
The chroma layers are reduced significantly. Rather than simply quantizing the palette of the chroma layers like GIF, JPEG can perform a process called "subsampling" wherein a chroma layer is stored at a lower resolution. When recombined by effectively stretching the lower resolution chroma layers over the luma layer, the difference is often imperceptible. Slight differences in the hue might be noticeable if we compare the original image source and our JPEG side-by-side, but only when we know exactly what to look for.
With that said, JPEG isn't perfect. As crafty as JPEG is about sneaking compression past us, it can become glaringly obvious if taken too far. In fact, if you've spent much time on the web—particularly in days long past—you may have noticed the result of JPEG compression taken too far:
Compressing image data too aggressively means the level of detail is reduced further than our psycho-visual systems would naturally ignore, so the illusion is broken. It becomes obvious that detail is missing. Because JPEG operates in terms of blocks, the seams between those blocks can start to show.
Progressive JPEG
Progressive JPEG (PJPEG) effectively reorders the process of rendering a JPEG. "Baseline" JPEGs are rendered from top to bottom as the transfer progresses, while progressive JPEG breaks rendering into a set of full-sized "scans"—likewise done top-to-bottom—with each scan increasing the quality of the image. The entire image appears immediately, albeit blurry, and grows clearer as the transfer continues.

It seems like a strictly technical difference on paper, but there's a huge perceptual benefit: by delivering a full-size version of the image right away instead of empty space, PJPEG can feel faster than a baseline JPEG to the end user. In addition, except for the smallest images, encoding an image as PJPEG almost always means a smaller file size compared to a baseline JPEG—not by much, but every byte helps.
There is one tiny trade-off, however: decoding PJPEG is more complex on the client side, which means putting a little more strain on the browser—and a device's hardware—during rendering. That rendering overhead is difficult to quantify in exact terms, but it's very minor and unlikely to be noticeable except for with severely underpowered devices. It's a trade-off worth making and, all told, progressive is a sensible default approach whenever encoding an image as JPEG.
Using JPEG
You might feel a little overwhelmed by all this information. There's good news for your day-to-day work, though: the more technical specifics of JPEG compression are abstracted away, instead exposed as a single "quality" setting: an integer from 0 to 100. 0 provides the smallest possible file size, and as you might expect, the worst possible visual quality. As you progress from 0 to 100 both the quality and the file size increase. This setting is subjective, of course—not every tool will interpret a value of "75" the same way, and perceptual quality always varies according to the content of the image.
To understand how this compression setting works, let's use a common web-based tool for optimizing image files: Squoosh.
Squoosh—maintained by the Chrome team—provides a side-by-side comparison between different methods of encoding and configuring image outputs, with configuration options ranging from a 0-100 global "quality" slider, to the ability to fine-tune details of chrominance vs. luminance resampling. The lower the "quality" number, the higher the compression, and the smaller the resulting file will be.
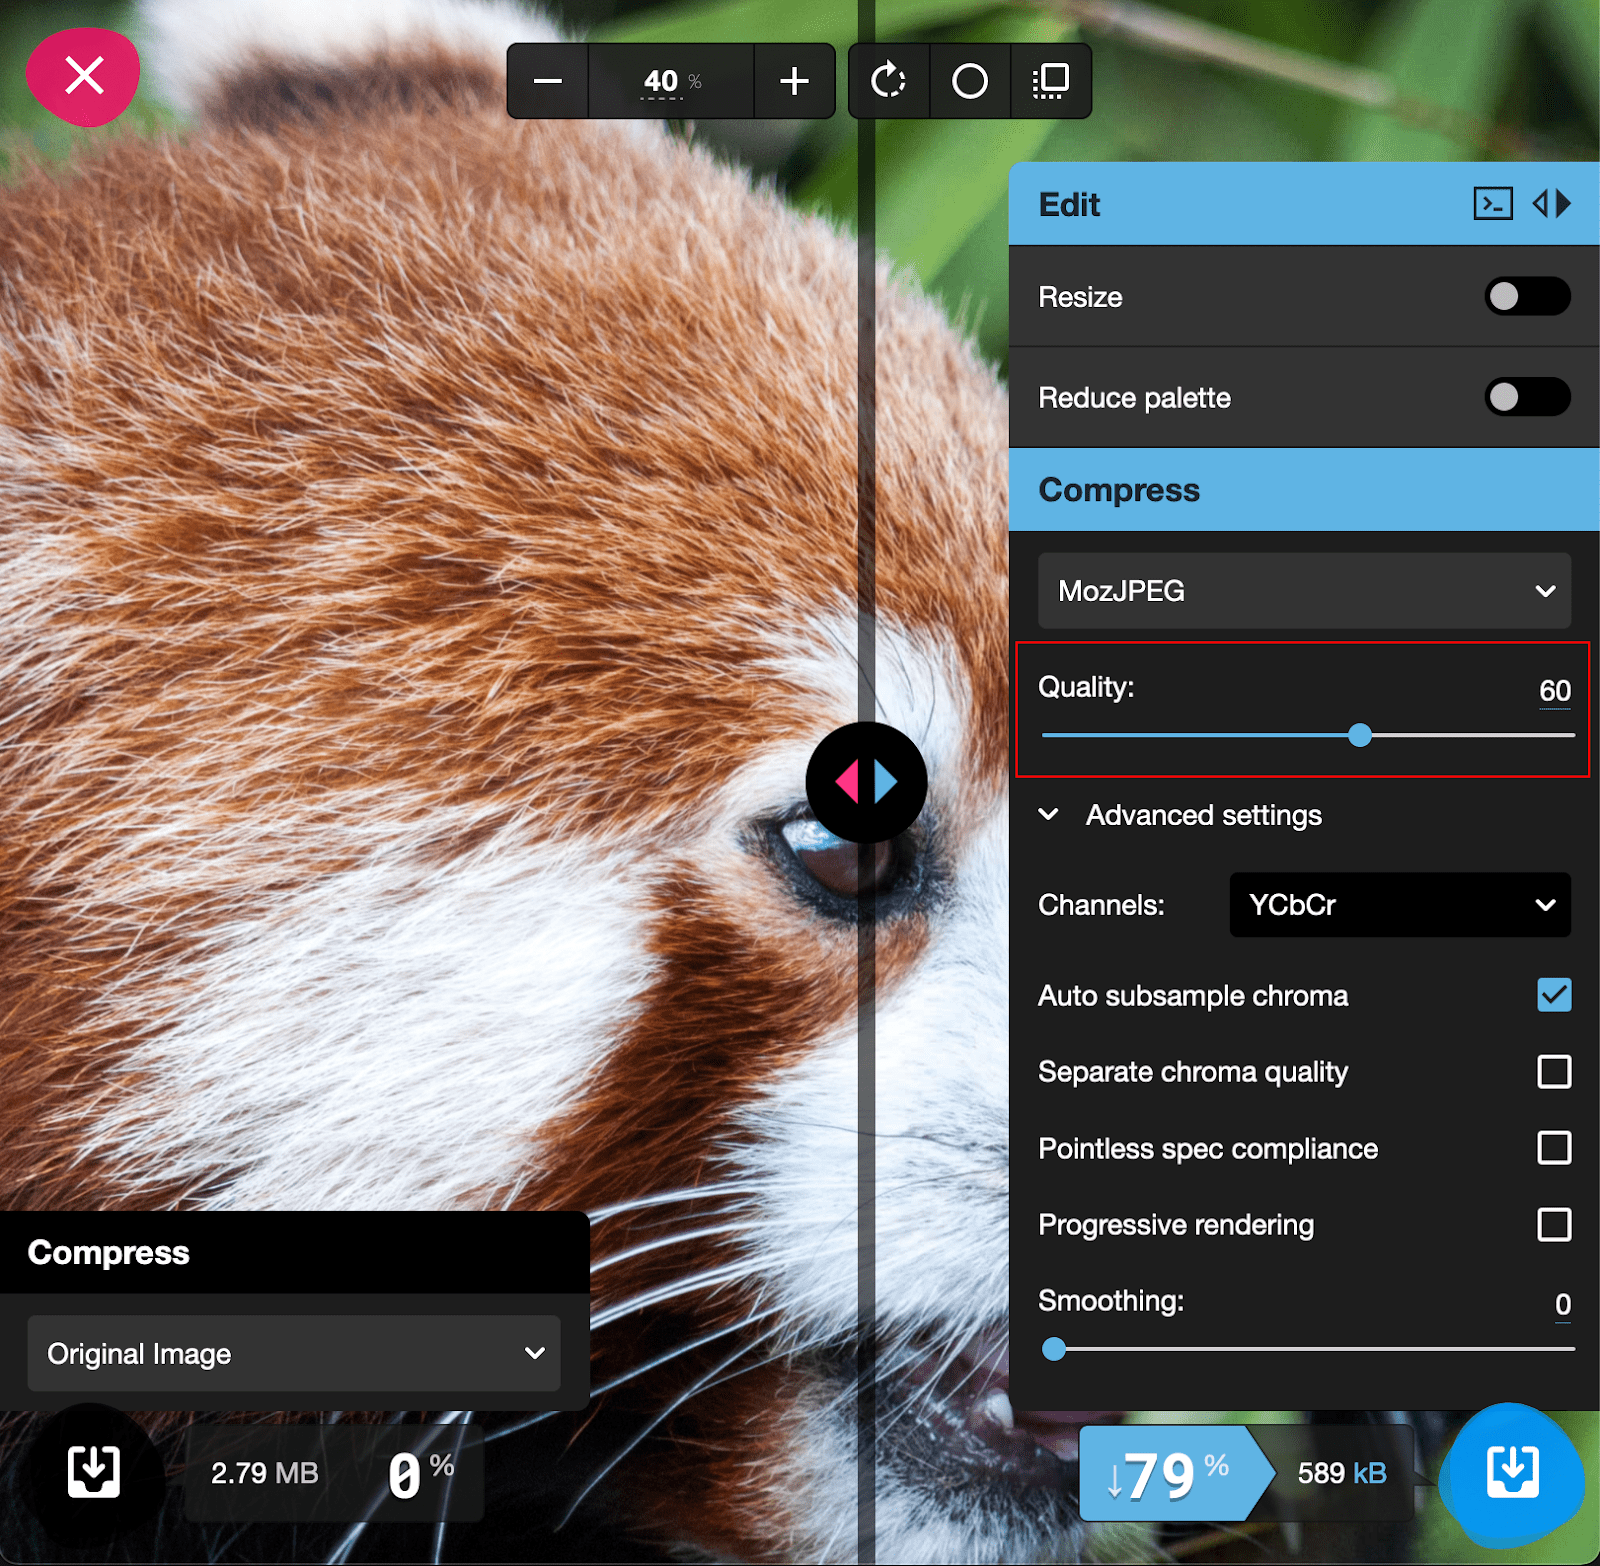
Here, with the "quality" set to 60, the file size is reduced by 79%. Don't be fooled by the implications of this label: differences in quality across most of the scale will be imperceptible to the human eye, even when performing a side-by-side comparison.
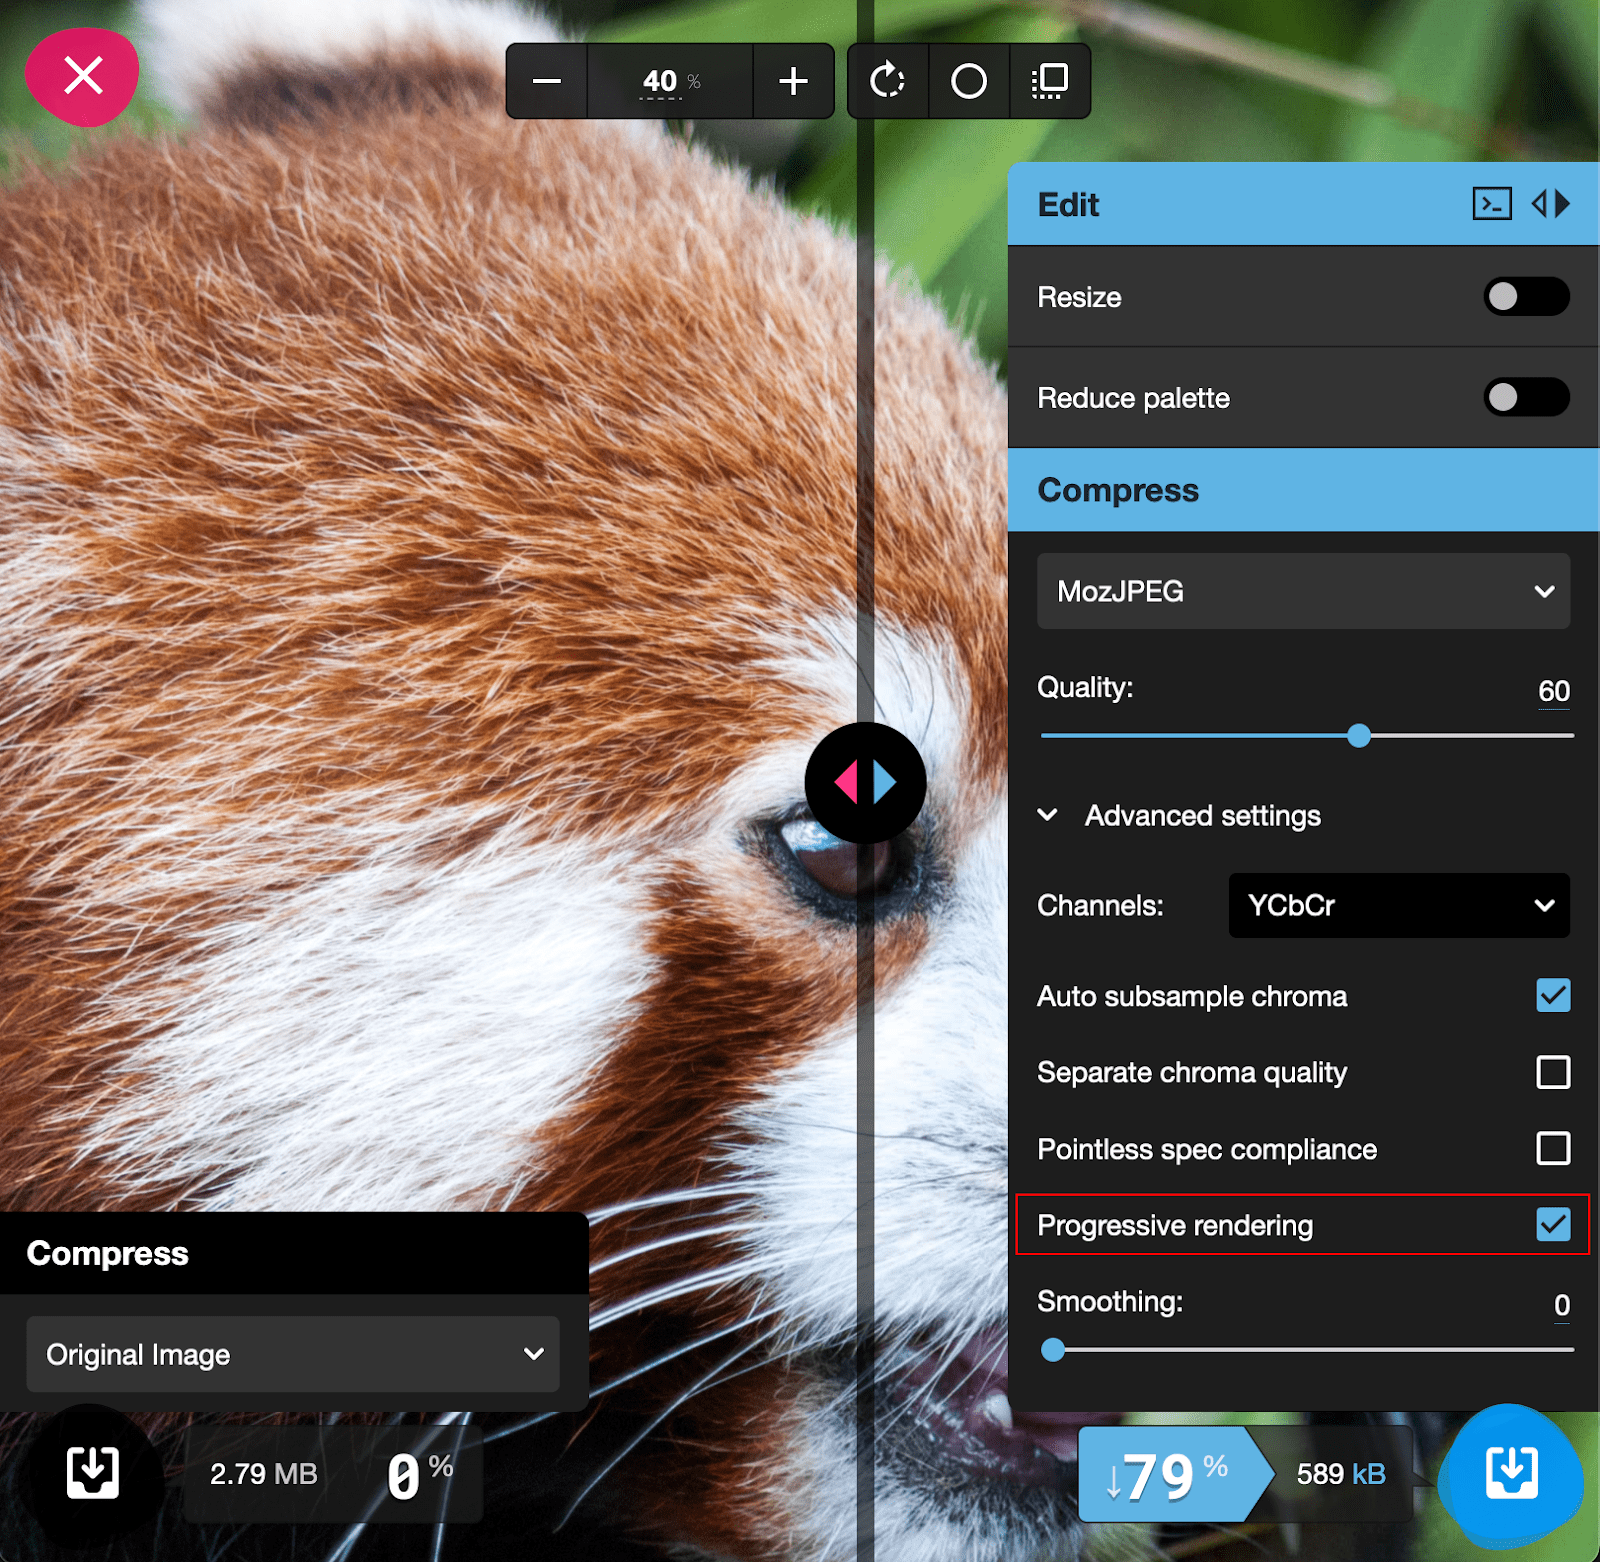
To convert your source image to a progressive JPEG, tick the box labeled "progressive rendering" under "advanced options." Some of these configuration options are almost certainly a deeper dive than the average web project will require, but they can provide you with a closer look at how the things you've learned about JPEG encoding impact file size and quality in real world use cases.
There is not much to it in practical terms, despite how complicated we now know JPEG to be internally. Squoosh is just one of countless methods of saving optimized JPEGs, all of which use a similar method of determining the compression level: a single integer between 0 and 100.
Determining the ideal level of compression for your images is a finesse game, given that all the complexity of JPEG encoding is being distilled down to a single integer, especially when so much hinges on the content of an image. Like thinking about blinking or breathing, considering JPEG compression settings changes how we perceive them.
Looking back outside now, after writing all this, my psycho-visual processing has become more manual—now I'm looking at the individual leaves, even though the picture itself—so to speak—hasn't changed. That makes configuring JPEG compression a little fraught: you know exactly what kinds of visual defects to look for. By thinking about image compression in the first place, you're focusing on individual leaves—we're primed to spot slight blurring and the occasional compression artifact. The harder you look for artifacts while fine-tuning your JPEG compression settings the more likely you are to find them, when a user likely wouldn't. Even if that user knew exactly what to look for, they're not likely to visit a page with JPEG compression on their mind.
For that reason, avoid the instinct to upscale an image looking for artifacts—or even look too closely at the parts of our images where you know artifacts will appear first. For users, faint artifacts blend in with the tiny details that their lossy psycho-visual systems usually gloss over. In fact, even with an understanding of the tricks JPEG tries to play, you wouldn't notice those same artifacts while browsing the web unless you went looking for them. For that reason, it's almost always a safe bet to nudge JPEG compression just a little lower than you think might be noticeable—especially when that image is going to be displayed smaller than its intrinsic size due to direct styling, or constraints set by the surrounding layout.