Most of the time, http://localhost behaves like HTTPS for development
purposes. However, there are some special cases,
such as custom hostnames or using secure cookies across browsers, where you need
to explicitly set up your development site to behave like HTTPS to accurately
represent how your site works in production. (If your production website doesn't
use HTTPS, make it a priority to switch to HTTPS).
This page explains how to run your site locally with HTTPS.
For brief instructions, see mkcert quick reference.**
Run your site locally with HTTPS using mkcert (recommended)
To use HTTPS with your local development site and access https://localhost or
https://mysite.example (custom hostname), you need a
TLS certificate
signed by an entity your device and browser trust, called a trusted
certificate authority (CA).
The browser checks whether your development server's certificate is signed by a
trusted CA before creating an HTTPS connection.
We recommend using mkcert, a cross-platform CA, to create and sign your certificate. For other helpful options, see Run your site locally with HTTPS: other options.
Many operating systems include libraries for creating certificates, such as openssl. However, they're more complex and less reliable than mkcert, and aren't necessarily cross-platform, which makes them less accessible to larger developer teams.
Setup
Install mkcert (only once).
Follow the instructions for installing mkcert on your operating system. For example, on macOS:
brew install mkcert
brew install nss # if you use Firefox
Add mkcert to your local root CAs.
In your terminal, run the following command:
mkcert -installThis generates a local certificate authority (CA). Your mkcert-generated local CA is only trusted locally, on your device.
Generate a certificate for your site, signed by mkcert.
In your terminal, navigate to your site's root directory or whichever directory you'd like to keep your certificate in.
Then, run:
mkcert localhostIf you're using a custom hostname like
mysite.example, run:mkcert mysite.exampleThis command does two things:
- Generates a certificate for the hostname you've specified.
- Lets mkcert sign the certificate.
Your certificate is now ready and signed by a certificate authority your browser trusts locally.
Configure your server to use HTTPS the TLS certificate you've just created.
The details of how to do this depend on your server. A few examples follow:
👩🏻💻 With node:
server.js(replace{PATH/TO/CERTIFICATE...}and{PORT}):const https = require('https'); const fs = require('fs'); const options = { key: fs.readFileSync('{PATH/TO/CERTIFICATE-KEY-FILENAME}.pem'), cert: fs.readFileSync('{PATH/TO/CERTIFICATE-FILENAME}.pem'), }; https .createServer(options, function (req, res) { // server code }) .listen({PORT});👩🏻💻 With http-server:
Start your server as follows (replace
{PATH/TO/CERTIFICATE...}):http-server -S -C {PATH/TO/CERTIFICATE-FILENAME}.pem -K {PATH/TO/CERTIFICATE-KEY-FILENAME}.pem-Sruns your server with HTTPS, while-Csets the certificate and-Ksets the key.👩🏻💻 With a React development server:
Edit your
package.jsonas follows, and replace{PATH/TO/CERTIFICATE...}:"scripts": { "start": "HTTPS=true SSL_CRT_FILE={PATH/TO/CERTIFICATE-FILENAME}.pem SSL_KEY_FILE={PATH/TO/CERTIFICATE-KEY-FILENAME}.pem react-scripts start"For example, if you've created a certificate for
localhostin your site's root directory:|-- my-react-app |-- package.json |-- localhost.pem |-- localhost-key.pem |--...Then your
startscript should look like this:"scripts": { "start": "HTTPS=true SSL_CRT_FILE=localhost.pem SSL_KEY_FILE=localhost-key.pem react-scripts start"👩🏻💻 Other examples:
Open
https://localhostorhttps://mysite.examplein your browser to double-check that you're running your site locally with HTTPS. You won't see any browser warnings, because your browser trusts mkcert as a local certificate authority.
mkcert quick reference
To run your local development site with HTTPS:
-
Set up mkcert.
If you haven't yet, install mkcert, for example on macOS:
brew install mkcert
Check install mkcert for Windows and Linux instructions.
Then, create a local certificate authority:
mkcert -install -
Create a trusted certificate.
mkcert {YOUR HOSTNAME e.g. localhost or mysite.example}
This creates a valid certificate that mkcert signs automatically.
-
Configure your development server to use HTTPS and the certificate you created in Step 2.
You can now access https://{YOUR HOSTNAME} in your browser, without warnings
</div>
Run your site locally with HTTPS: other options
The following are other ways to set up your certificate. These are generally more complicated or riskier than using mkcert.
Self-signed certificate
You can also decide to not use a local certificate authority like mkcert, and instead sign your certificate yourself. This approach has a few pitfalls:
- Browsers don't trust you as a certificate authority, so they'll show warnings
you need to bypass manually. In Chrome, you can use the flag
#allow-insecure-localhostto bypass this warning automatically onlocalhost. - This is unsafe if you're working in an insecure network.
- It's not necessarily easier or faster than using a local CA like mkcert.
- Self-signed certificates won't behave in exactly the same way as trusted certificates.
- If you're not using this technique in a browser context, you need to disable certificate verification for your server. Forgetting to re-enable it in production causes security issues.

If you don't specify a certificate, React's and Vue's development server HTTPS options create a self-signed certificate under the hood. This is quick, but it comes with the same browser warnings and other pitfalls of self-signed certificates. Fortunately, you can use frontend frameworks' built-in HTTPS option and specify a locally trusted certificate created using mkcert or similar. For more information, see the mkcert with React example.
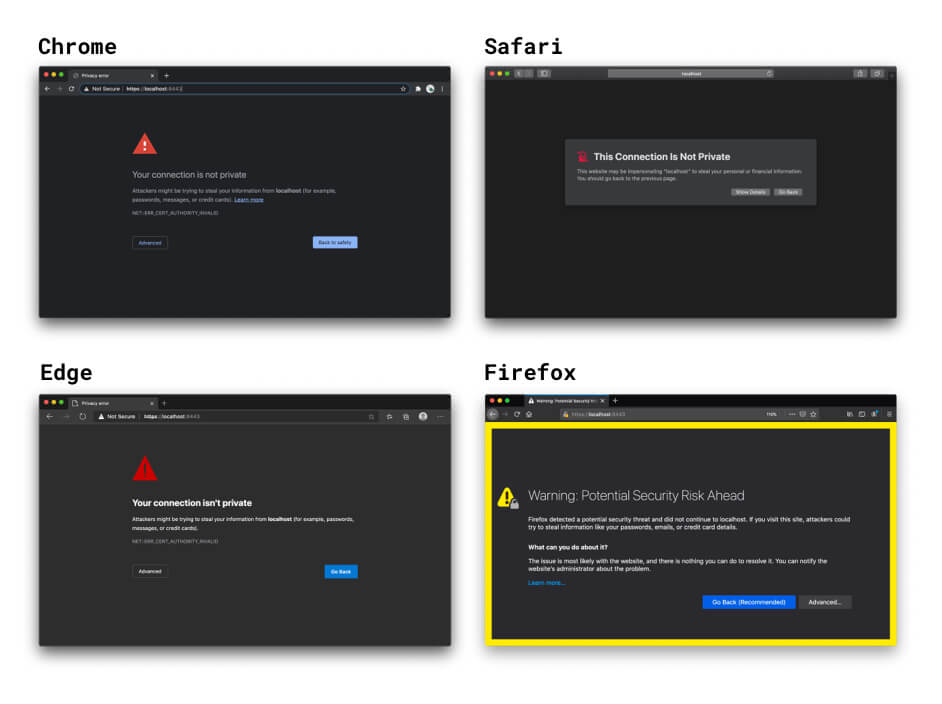
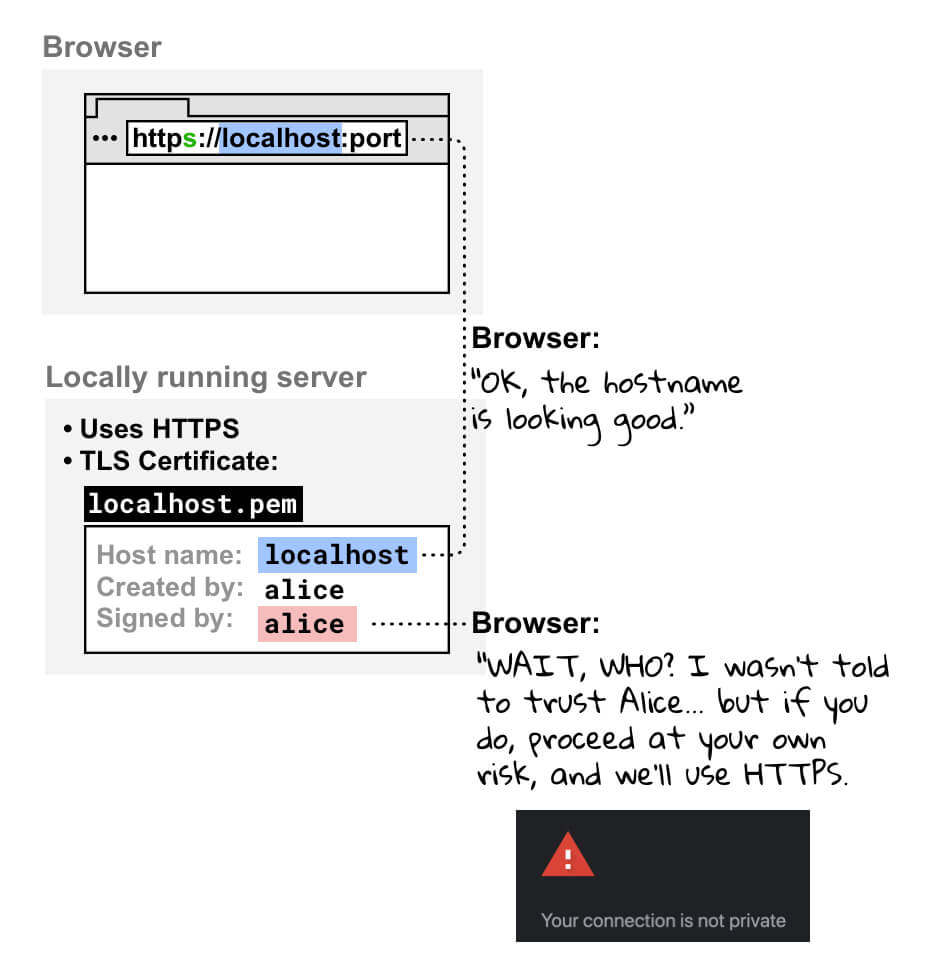
If you open your locally running site in your browser using HTTPS, your browser checks the certificate of your local development server. When it sees that you've signed the certificate yourself, it checks whether you're registered as a trusted certificate authority. Because you're not, your browser can't trust the certificate, and it shows a warning telling you your connection isn't secure. It still creates the HTTPS connection if you proceed, but you do so at your own risk.

Certificate signed by a regular certificate authority
You can also use a certificate signed by an official CA. This comes with the following complications:
- You have more setup work to do than when using a local CA technique like mkcert.
- You need to use a valid domain name that you control. This means you can't
use official CAs for the following:
localhostand other reserved domain names likeexampleortest.- Any domain name you don't control.
- Invalid top-level domains. For more information, refer to the list of valid top-level domains.
Reverse proxy
Another option to access a locally running site with HTTPS is using a reverse proxy such as ngrok. This comes with the following risks:
- Anyone you share the reverse proxy URL with can access your local development site. This can be helpful for demoing your project to clients, but it can also let unauthorized people share sensitive information.
- Some reverse proxy services charge for usage, so pricing might be a factor in your choice of service.
- New security measures in browsers can affect the way these tools work.
Flag (not recommended)
If you're using a custom hostname like mysite.example in Chrome, you can use a
flag to force the browser to consider mysite.example secure. Avoid doing this
for the following reasons:
- You need to be 100% sure that
mysite.examplealways resolves to a local address. Otherwise, you risk leaking production credentials. - This flag only works in Chrome, so you can't debug across browsers.
With many thanks for contributions and feedback to all reviewers and contributors—especially Ryan Sleevi, Filippo Valsorda, Milica Mihajlija and Rowan Merewood. 🙌
Except as otherwise noted, the content of this page is licensed under the Creative Commons Attribution 4.0 License, and code samples are licensed under the Apache 2.0 License. For details, see the Google Developers Site Policies. Java is a registered trademark of Oracle and/or its affiliates.
Last updated 2021-01-25 UTC.

