


Image content delivery networks (CDNs) are excellent at optimizing images for the web. Switching your website to an image CDN can yield a 40–80% savings in image file size, and in most cases they can optimize your images better than a build-time image optimization script.
What's an image CDN?
Image CDNs specialize in transforming, optimizing, and delivering images. You can also think of them as APIs for accessing and manipulating the images used on your site. For images loaded from an image CDN, an image URL indicates not only which image to load, but also parameters like size, format, and quality. This lets you create variations of an image for different use cases.
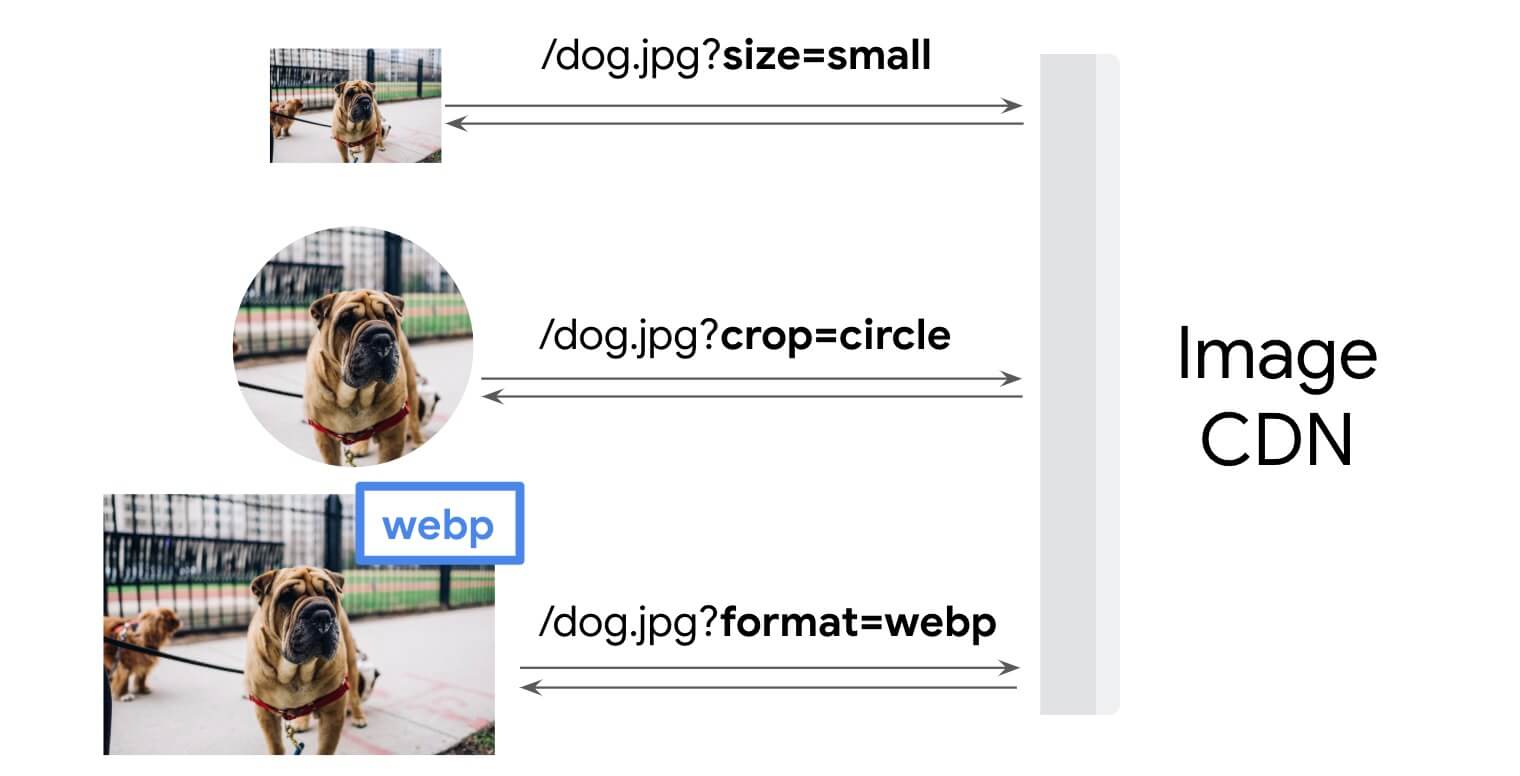
Image CDNs are different from build-time image optimization scripts in that they create new versions of images as they're needed. As a result, CDNs are generally better suited to creating images that are heavily customized for individual clients than build scripts are.
How image CDNs use URLs to indicate optimization options
Image URLs used by image CDNs convey important information about an image and the transformations and optimizations that should be applied to it. URL formats vary depending on the image CDN you're using, but at a high level, they all have similar features. Here are some of the most common features.

Origin
An image CDN can live on your own domain or the domain of your image CDN. Third-party image CDNs typically offer the option of using a custom domain for a fee. Using your own domain makes it easier to switch image CDNs later on because no URL changes will be needed.
The previous example uses the image CDN's domain ("example-cdn.com") with a personalized subdomain, instead of a custom domain.
Image
Image CDNs can usually be configured to automatically retrieve images from their
existing locations when they're needed. This capability is often achieved by
including the complete URL of the existing image within the URL for the image
generated by the image CDN. For example, you might see a URL that looks like
this: https://my-site.example-cdn.com/https://flowers.com/daisy.jpg/quality=auto.
This URL would retrieve and optimize the image that exists at https://flowers.com/daisy.jpg.
The requested file format (JPG, in the example) might not be the same as the
image file format returned (WebP, in the example). The content-type HTTP
header tells the browser which format the URL is in so it can process the URL
appropriately. This can cause confusion if the file is saved to disk and used by
another program that expects the format to match the file extension.
Another widely supported way of uploading images to an image CDN is to send them in an HTTP POST request to the image CDN's API.
Security key
A security key prevents other people from creating new versions of your images. With this feature enabled, each new version of an image requires a unique security key.
If someone tries to change the parameters of the image URL but doesn't provide a valid security key, they won't be able to create a new version. Your image CDN takes care of the details of generating and tracking security keys for you.
Transformations
Image CDNs offer tens, and in some cases hundreds, of different image transformations. These transformations are specified in the URL string, and there are no restrictions on using multiple transformations at the same time. For web performance, the most important image transformations are size, pixel density, format, and compression. These transformations are the reason that switching to an image CDN typically makes your site's image files smaller.
Because there's usually an objectively best setting for performance transformations, some image CDNs support an "auto" mode for these transformations. For example, instead of specifying that images be transformed to the WebP format, you can let the CDN automatically select and serve the optimal format. An image CDN can determine the best way to transform an image using the following signals, among others:
- Client hints (for example, viewport width, DPR, and image width)
- The
Save-Dataheader - The User-Agent request header
- The Network Information API
For example, the image CDN might serve AVIF to a Chrome browser, WebP to an Edge browser, and JPEG to a very old browser. Auto settings are popular because they let you take advantage of image CDNs' expertise in optimizing images without needing to change your code to adopt new technologies when the image CDN starts supporting them.
Types of Image CDNs
There are two major categories of image CDNs: self-managed and third-party-managed.
Self-managed image CDNs
Self-managed CDNs can be a good choice for sites with engineering staff who are comfortable maintaining their own infrastructure.
- Thumbor is the most popular self-managed image CDN. It's open-source and free to use, but it has fewer features than most commercial CDNs, and its documentation is somewhat limited. Sites that use thumbor include Wikipedia, Square, and 99designs. See How to install the Thumbor image CDN for instructions on setting it up.
- Imaginary
- Imagor
Third-party image CDNs
Third-party image CDNs provide image CDNs as a service. In the same way that cloud providers provide servers and other infrastructure for a fee, image CDNs provide image optimization and delivery for a fee. Because third-party image CDNs maintain the underlying technology, you can usually get started using one fairly quickly, although a complete migration for a large site might take longer. Third-party image CDNs are typically priced based on usage tiers, with most image CDNs providing either a free tier or a free trial to let you try out their product.
Choose an image CDN
There are many good options for image CDNs. Some have more features than others, but any of them can help you save bytes on your images and therefore load your pages faster. Besides feature sets, other factors to consider when choosing an image CDN are cost, support, documentation, and ease of setup or migration.
Effects on Largest Contentful Paint (LCP)
Images are a vital part of the user experience on many websites, so they're an important factor in a site's Largest Contentful Paint. Here are a few things to keep in mind if you decide to use an image CDN:
- Images served from CDNs can come from a cross-origin server, which can increase your site's connection setup time. When possible, try to use an image CDN that proxies through the primary origin so you're not adding extra origins for the browser to connect to. This has the same effect as self-hosting images on the primary origin.
- Consider using a
fetchpriorityattribute value of"high"on the LCP image element so the browser can begin loading that image as soon as possible. - If an image isn't immediately discoverable in the initial HTML, consider using
a
rel=preloadhint for your LCP candidate image so the browser can load that image ahead of time. - If you can't proxy through your origin, and the browser won't know which image to load until later in the page load, set up a connection to the cross-origin image CDN as early as possible to shorten the resource loading phase for potential LCP candidate images.