

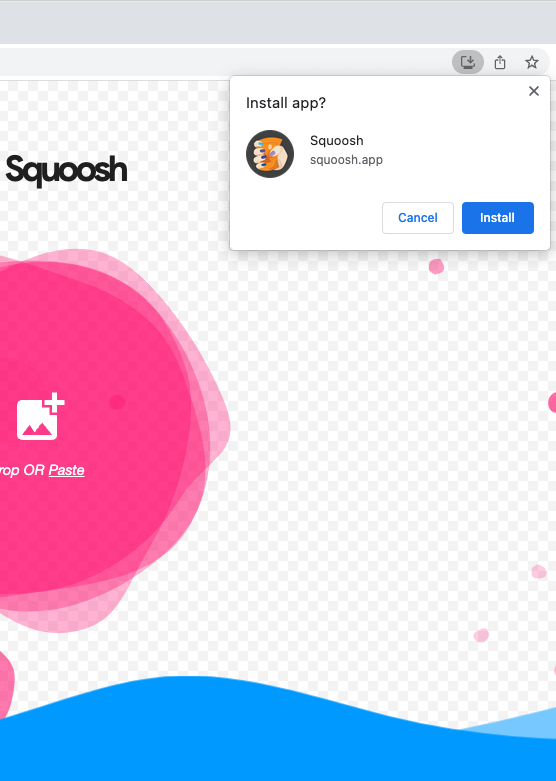
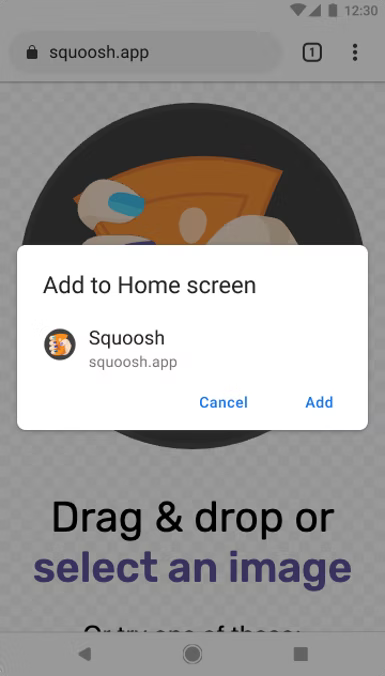
デフォルトのプロンプト
十分なコンテキストが提供されていないデフォルトの例を以下に示します。
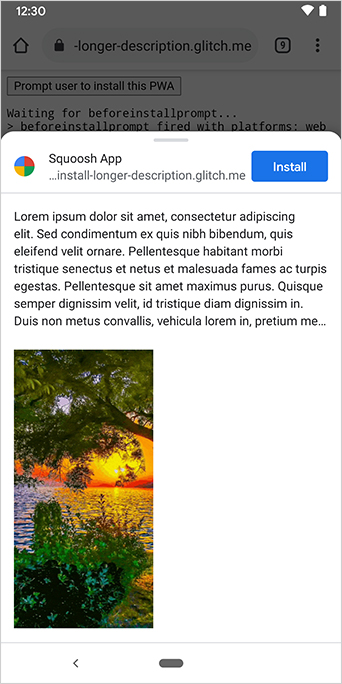
リッチなインストール UI
通常の小さなデフォルトのプロンプトではなく、リッチなインストール UI ダイアログを表示するには、ウェブ マニフェストに screenshots フィールドと description フィールドを追加します。以下の Squoosh.app の例をご覧ください。
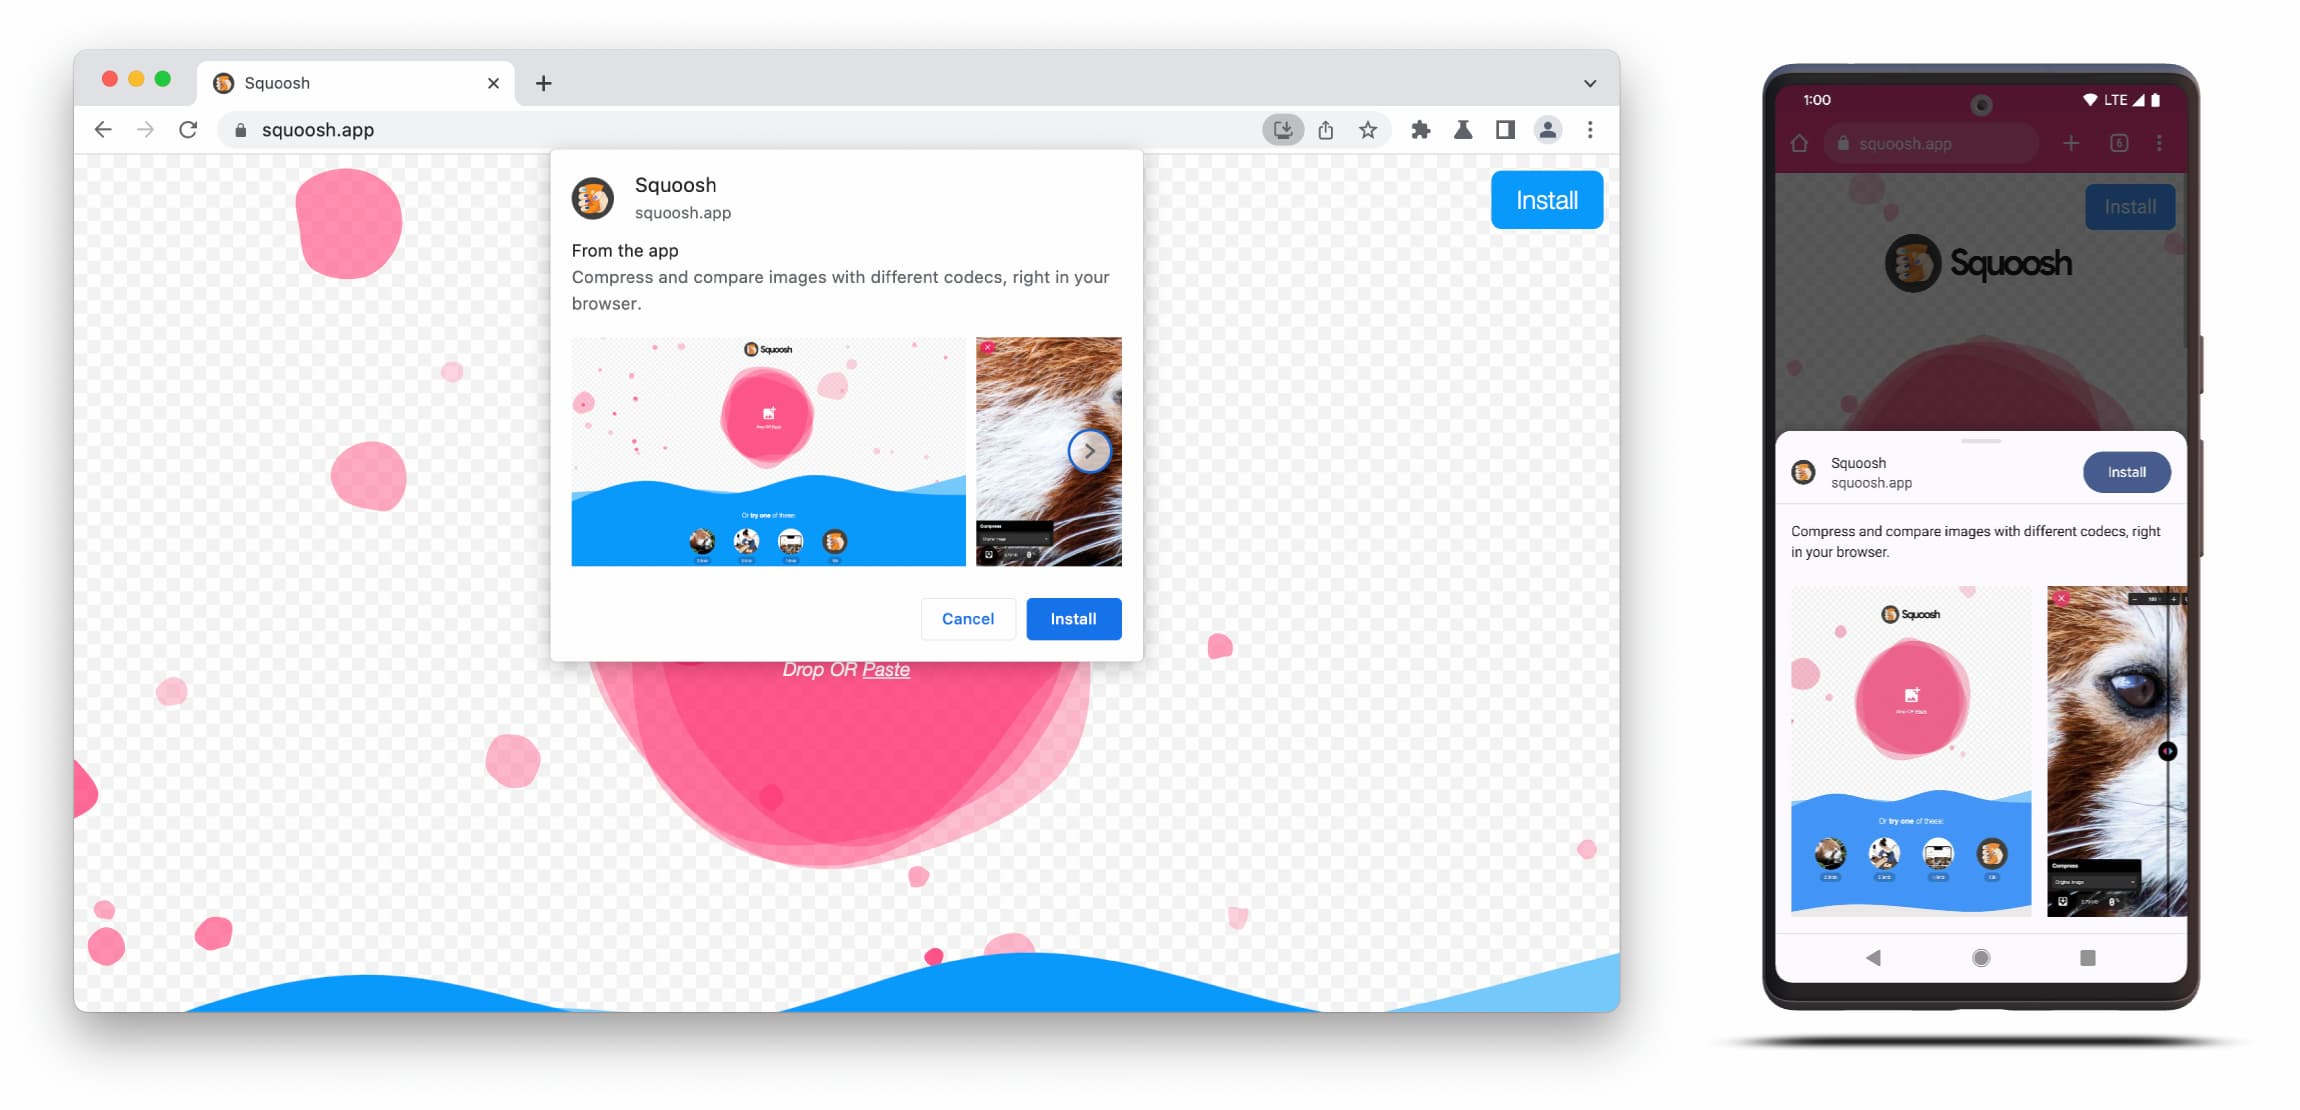
リッチ インストール UI ダイアログは、ウェブ マニフェストの description フィールドと screenshots フィールドの内容で構成されます。
ダイアログをトリガーするには、対応するフォーム ファクタのスクリーンショットを 1 枚以上追加するだけで済みますが、説明も追加することをおすすめします。これらのフィールドの詳細については、以下をご覧ください。
スクリーンショット
スクリーンショットは、新しいインストール UI に「リッチ」な要素を追加するものであり、使用することを強くおすすめします。マニフェストに screenshots メンバーを追加します。このメンバーは、少なくとも 1 つの画像を必要とする配列を受け取ります。Chrome は最大 8 つの画像を表示します。たとえば、次のようになります。
 "screenshots": [
    {
     "src": "source/image1.png",
      "sizes": "640x320",
      "type": "image/png",
      "form_factor": "wide",
      "label": "Wonder Widgets"
    }
]
スクリーンショットは次の条件を満たしている必要があります。
- 幅と高さは 320 ピクセル以上、3,840 ピクセル以下にする必要があります。
- 最大サイズを最小サイズの 2.3 倍以上にすることはできません。
- 同じフォーム ファクタ値を持つすべてのスクリーンショットは、同じアスペクト比である必要があります。
- サポートされている画像形式は JPEG と PNG のみです。
- スクリーンショットは 8 枚のみ表示されます。追加された場合、ユーザー エージェントはそれらを無視します。
また、画像を正しくレンダリングするために、画像のサイズとタイプを含める必要があります。
form_factor は、スクリーンショットをパソコン環境(wide)とモバイル環境(narrow)のどちらに表示するかをブラウザに指示します。
説明
description メンバーは、インストール プロンプトでアプリを説明し、アプリを保持するようユーザーに促します。
description がなくてもダイアログは表示されますが、使用することが推奨されます。テキストが 7 行(約 324 文字)を超えると、それ以降は切り捨てられ、省略記号が付加されます。
{
…
"description": "Compress and compare images with different codecs
right in your browser."
}
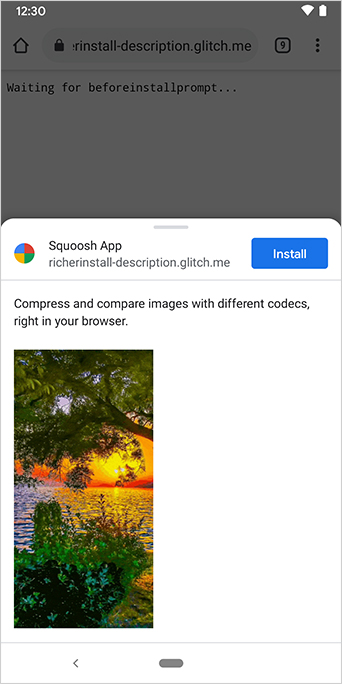
説明はインストール プロンプトの上部に表示されます。
スクリーンショットからわかるように、インストール ダイアログにはアプリのオリジンも表示されます。UI に収まらないほど長いオリジンは切り捨てられます。これは省略とも呼ばれ、ユーザーを保護するためのセキュリティ対策として使用されます。
関連情報
デモ
HTML
<!DOCTYPE html>
<html lang="en">
  <head>
    <meta charset="utf-8" />
    <meta name="viewport" content="width=device-width, initial-scale=1" />
    <meta name="color-scheme" content="dark light" />
    <link rel="manifest" href="manifest.json" />
    <title>How to add Richer Install UI to your web app</title>
    <!-- TODO: Devsite - Removed inline handlers -->
    <!-- <script>
      if ('serviceWorker' in navigator) {
        window.addEventListener('load', () => {
          navigator.serviceWorker.register('sw.js');
        });
      }
    </script>
    <script type="module" src="script.js"></script> -->
  </head>
  <body>
    <h1>How to add Richer Install UI to your web app</h1>
    <ol>
      <li>
        Install the app by clicking the button below. After the installation,
        the button is disabled.
        <p>
          <button disabled type="button">Install</button>
        </p>
      </li>
      <li>
        When you click on install a dialog similar to the ones from app stores
        will be displayed.
      </li>
      <li>
        The dialog includes the `description` and `screenshots` set in the app
        manifest.
      </li>
      <li>
        Screenshots should be different depending if the app is being installed
        on a mobile or desktop device, according to the `form_factor` value set
        for the screenshots on the manifest
      </li>
    </ol>
  </body>
</html>
JS
        // The install button.
const installButton = document.querySelector('button');

// Only relevant for browsers that support installation.
if ('BeforeInstallPromptEvent' in window) {
  // Variable to stash the `BeforeInstallPromptEvent`.
  let installEvent = null;

  // Function that will be run when the app is installed.
  const onInstall = () => {
    // Disable the install button.
    installButton.disabled = true;
    // No longer needed.
    installEvent = null;
  };

  window.addEventListener('beforeinstallprompt', (event) => {
    // Do not show the install prompt quite yet.
    event.preventDefault();
    // Stash the `BeforeInstallPromptEvent` for later.
    installEvent = event;
    // Enable the install button.
    installButton.disabled = false;
  });

  installButton.addEventListener('click', async () => {
    // If there is no stashed `BeforeInstallPromptEvent`, return.
    if (!installEvent) {
      return;
    }
    // Use the stashed `BeforeInstallPromptEvent` to prompt the user.
    installEvent.prompt();
    const result = await installEvent.userChoice;
    // If the user installs the app, run `onInstall()`.
    if (result.outcome === 'accepted') {
      onInstall();
    }
  });

  // The user can decide to ignore the install button
  // and just use the browser prompt directly. In this case
  // likewise run `onInstall()`.
  window.addEventListener('appinstalled', () => {
    onInstall();
  });
}