

Adriana Jara
預設提示
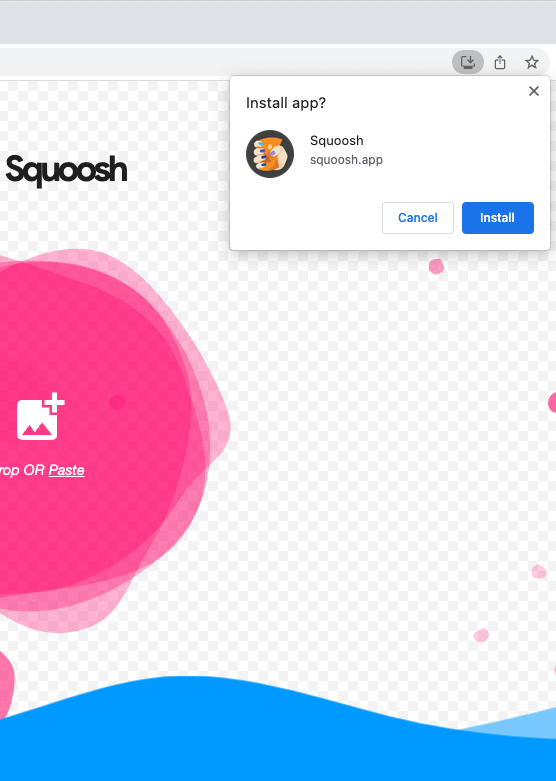
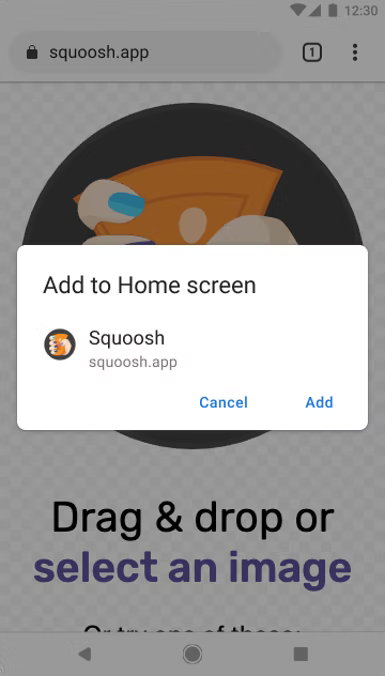
請參閱下方的預設體驗範例,其中提供的背景資訊不足。
更豐富的安裝 UI
如要取得「更豐富的安裝使用者介面」對話方塊,而非一般的小型預設提示,請在網頁資訊清單中新增 screenshots 和 description 欄位。請參考下方的 Squoosh.app 範例:
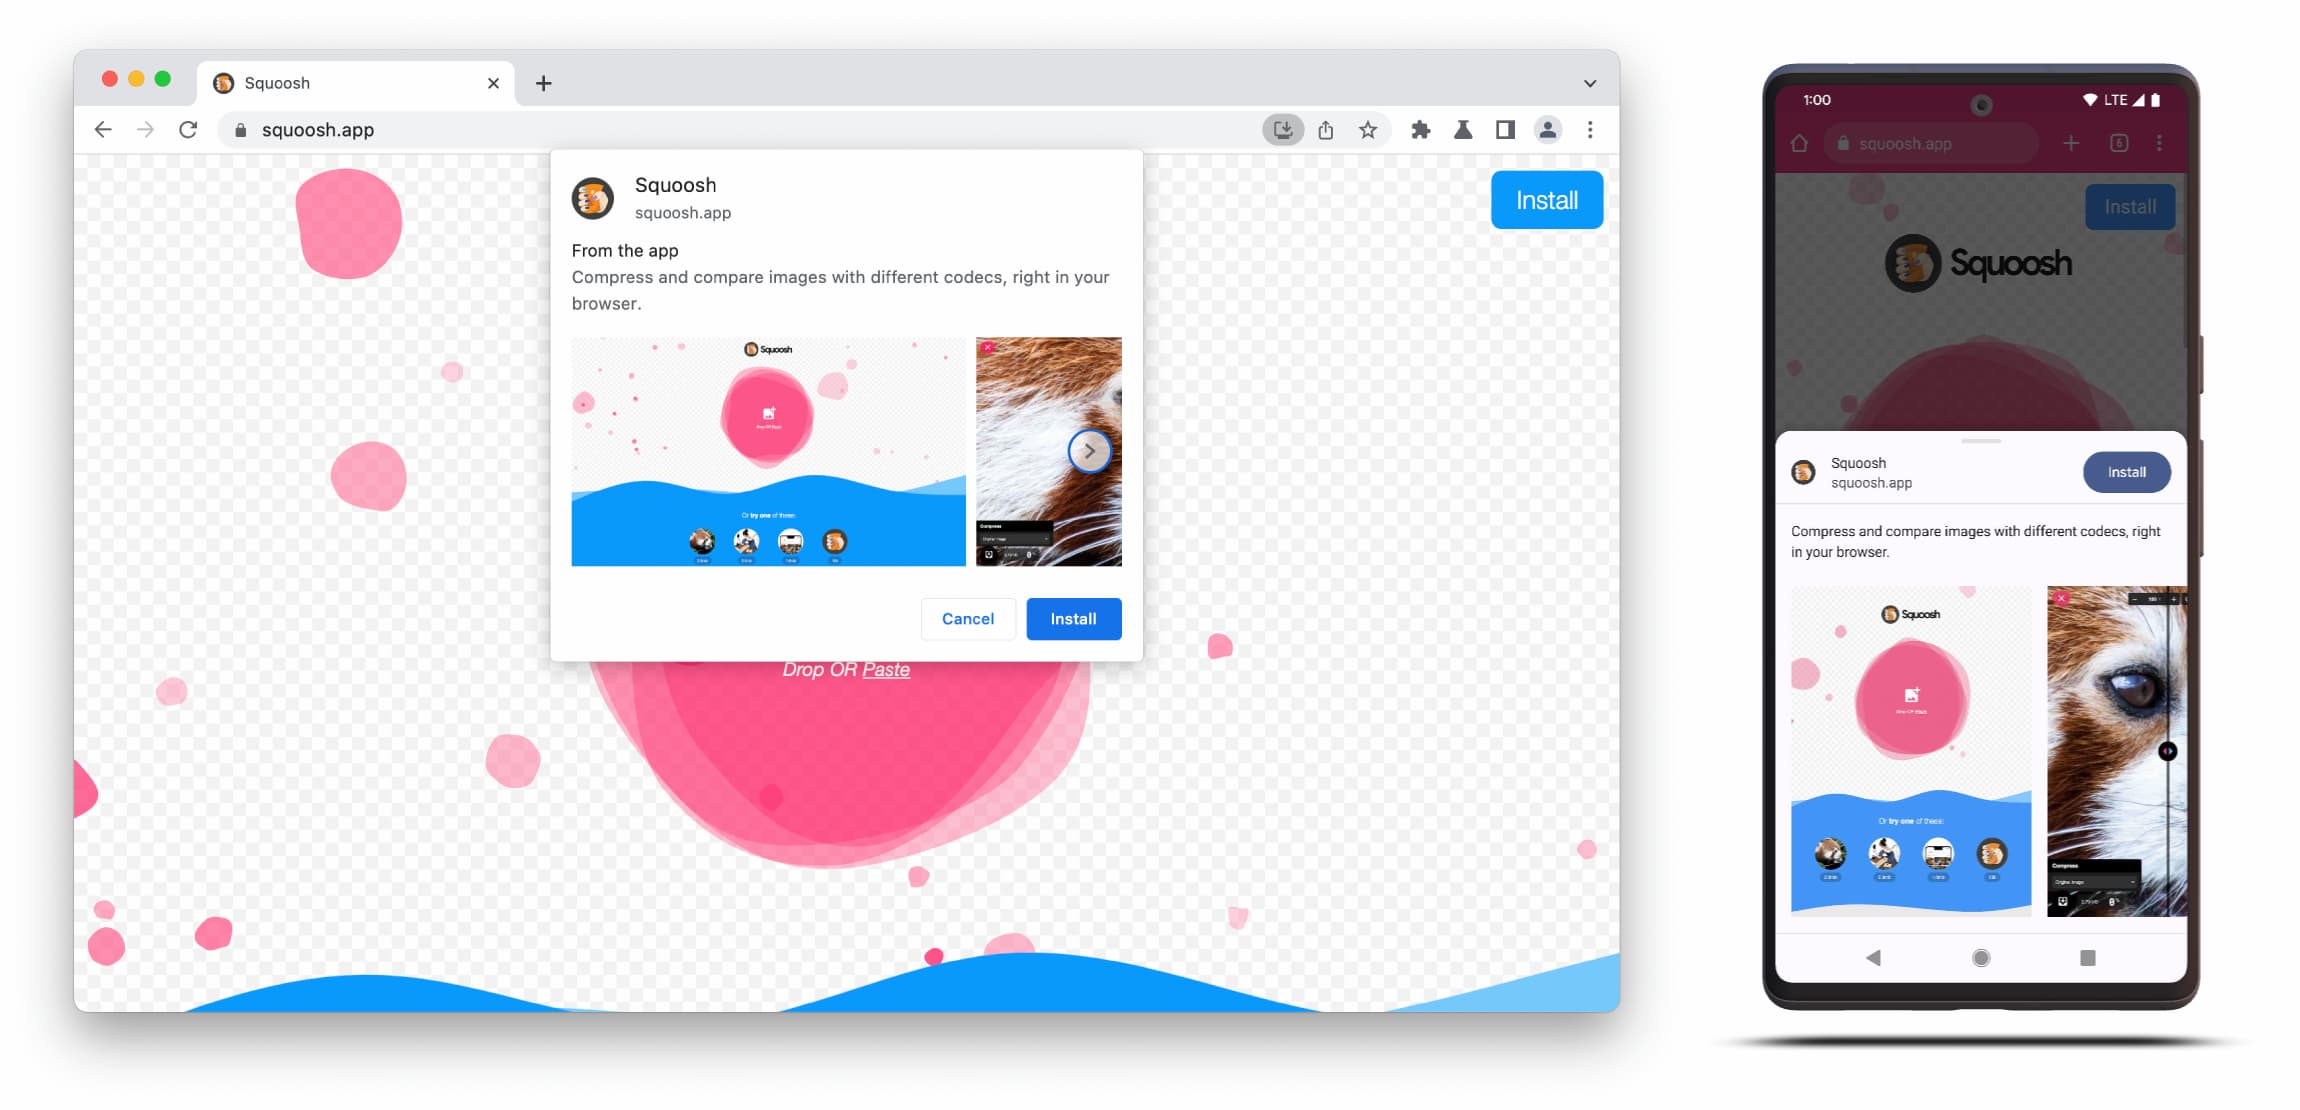
「更豐富的安裝 UI」對話方塊是由網頁資訊清單中的 description 和 screenshots 欄位內容組成。
如要觸發對話方塊,您只需要為對應的板型規格新增至少一張螢幕截圖,但建議一併新增說明。詳情請參閱下文。
螢幕截圖
螢幕截圖可為新安裝使用者介面增添豐富性,因此強烈建議您使用。在資訊清單中新增 screenshots 成員,該成員會採用至少一張圖片的陣列,而 Chrome 最多會顯示八張圖片。範例如下所示。
 "screenshots": [
    {
     "src": "source/image1.png",
      "sizes": "640x320",
      "type": "image/png",
      "form_factor": "wide",
      "label": "Wonder Widgets"
    }
]
螢幕截圖必須符合下列條件:
- 寬度和高度必須至少為 320 像素,且不得超過 3,840 像素。
- 長邊的尺寸不可超過短邊的 2.3 倍。
- 凡是相同外型規格的螢幕截圖,顯示比例都必須一致。
- 僅支援 JPEG 和 PNG 圖片格式。
- 系統只會顯示八張螢幕截圖。如果新增更多,使用者代理程式只會忽略這些項目。
此外,您還需要加入圖片大小和類型,確保圖片正確顯示。
form_factor 會向瀏覽器指出螢幕截圖應顯示在電腦 (wide) 或行動裝置環境 (narrow)。
說明
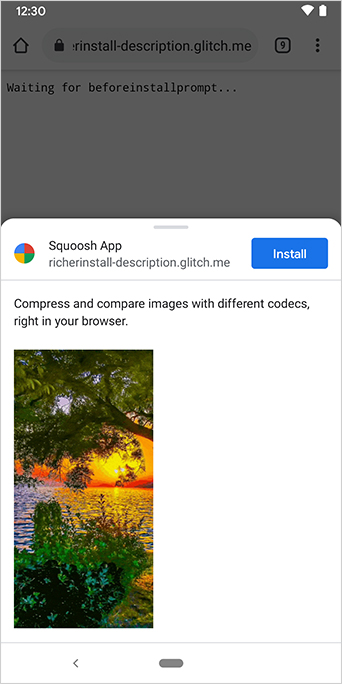
description 成員會在安裝提示中說明應用程式,邀請使用者保留應用程式。
即使沒有 description,系統也會顯示對話方塊,但建議您提供這項資訊。
文字最多可顯示 7 行 (約 324 個半形字元),超過長度的說明會遭到截斷,並加上省略符號。
{
…
"description": "Compress and compare images with different codecs
right in your browser."
}
 已新增說明。
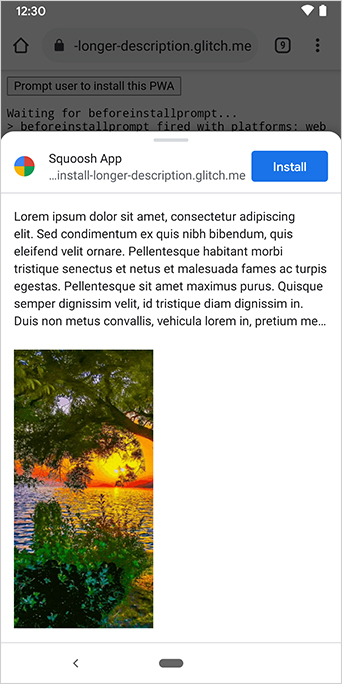
說明會顯示在安裝提示頂端。
您可能已從螢幕截圖中發現,安裝對話方塊也會列出應用程式的來源。如果來源過長而無法顯示在 UI 中,系統會截斷來源,這也稱為省略,是保護使用者的安全措施。
延伸閱讀
示範
HTML
<!DOCTYPE html>
<html lang="en">
  <head>
    <meta charset="utf-8" />
    <meta name="viewport" content="width=device-width, initial-scale=1" />
    <meta name="color-scheme" content="dark light" />
    <link rel="manifest" href="manifest.json" />
    <title>How to add Richer Install UI to your web app</title>
    <!-- TODO: Devsite - Removed inline handlers -->
    <!-- <script>
      if ('serviceWorker' in navigator) {
        window.addEventListener('load', () => {
          navigator.serviceWorker.register('sw.js');
        });
      }
    </script>
    <script type="module" src="script.js"></script> -->
  </head>
  <body>
    <h1>How to add Richer Install UI to your web app</h1>
    <ol>
      <li>
        Install the app by clicking the button below. After the installation,
        the button is disabled.
        <p>
          <button disabled type="button">Install</button>
        </p>
      </li>
      <li>
        When you click on install a dialog similar to the ones from app stores
        will be displayed.
      </li>
      <li>
        The dialog includes the `description` and `screenshots` set in the app
        manifest.
      </li>
      <li>
        Screenshots should be different depending if the app is being installed
        on a mobile or desktop device, according to the `form_factor` value set
        for the screenshots on the manifest
      </li>
    </ol>
  </body>
</html>
JS
        // The install button.
const installButton = document.querySelector('button');

// Only relevant for browsers that support installation.
if ('BeforeInstallPromptEvent' in window) {
  // Variable to stash the `BeforeInstallPromptEvent`.
  let installEvent = null;

  // Function that will be run when the app is installed.
  const onInstall = () => {
    // Disable the install button.
    installButton.disabled = true;
    // No longer needed.
    installEvent = null;
  };

  window.addEventListener('beforeinstallprompt', (event) => {
    // Do not show the install prompt quite yet.
    event.preventDefault();
    // Stash the `BeforeInstallPromptEvent` for later.
    installEvent = event;
    // Enable the install button.
    installButton.disabled = false;
  });

  installButton.addEventListener('click', async () => {
    // If there is no stashed `BeforeInstallPromptEvent`, return.
    if (!installEvent) {
      return;
    }
    // Use the stashed `BeforeInstallPromptEvent` to prompt the user.
    installEvent.prompt();
    const result = await installEvent.userChoice;
    // If the user installs the app, run `onInstall()`.
    if (result.outcome === 'accepted') {
      onInstall();
    }
  });

  // The user can decide to ignore the install button
  // and just use the browser prompt directly. In this case
  // likewise run `onInstall()`.
  window.addEventListener('appinstalled', () => {
    onInstall();
  });
}