


الطلب التلقائي
في ما يلي مثال على التجربة التلقائية التي لا توفّر سياقًا كافيًا.
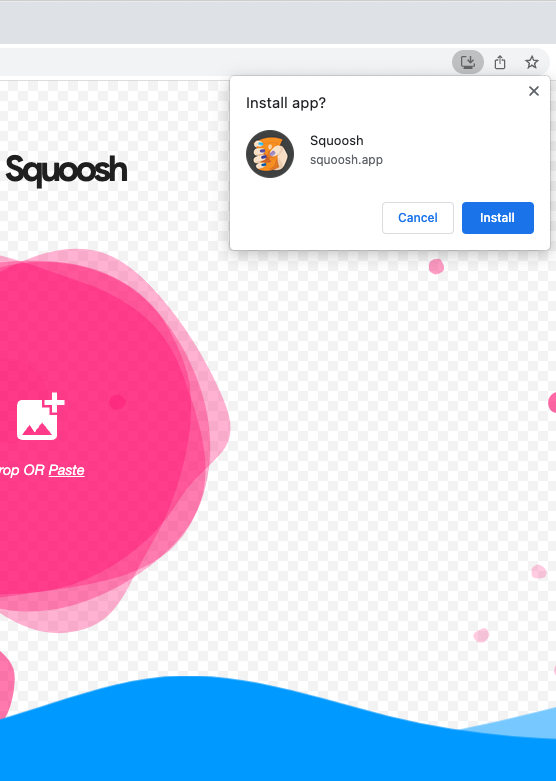
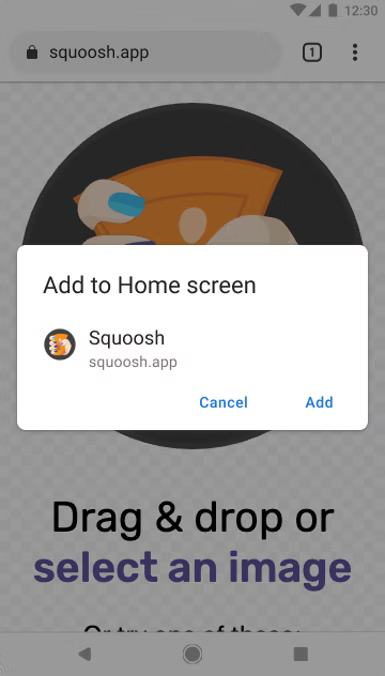
واجهة المستخدم Richer Install
للحصول على مربّع حوار واجهة المستخدم Richer Install بدلاً من الطلب التلقائي الصغير العادي، أضِف الحقلَين screenshots وdescription إلى بيان تطبيق الويب. في ما يلي مثال على Squoosh.app:
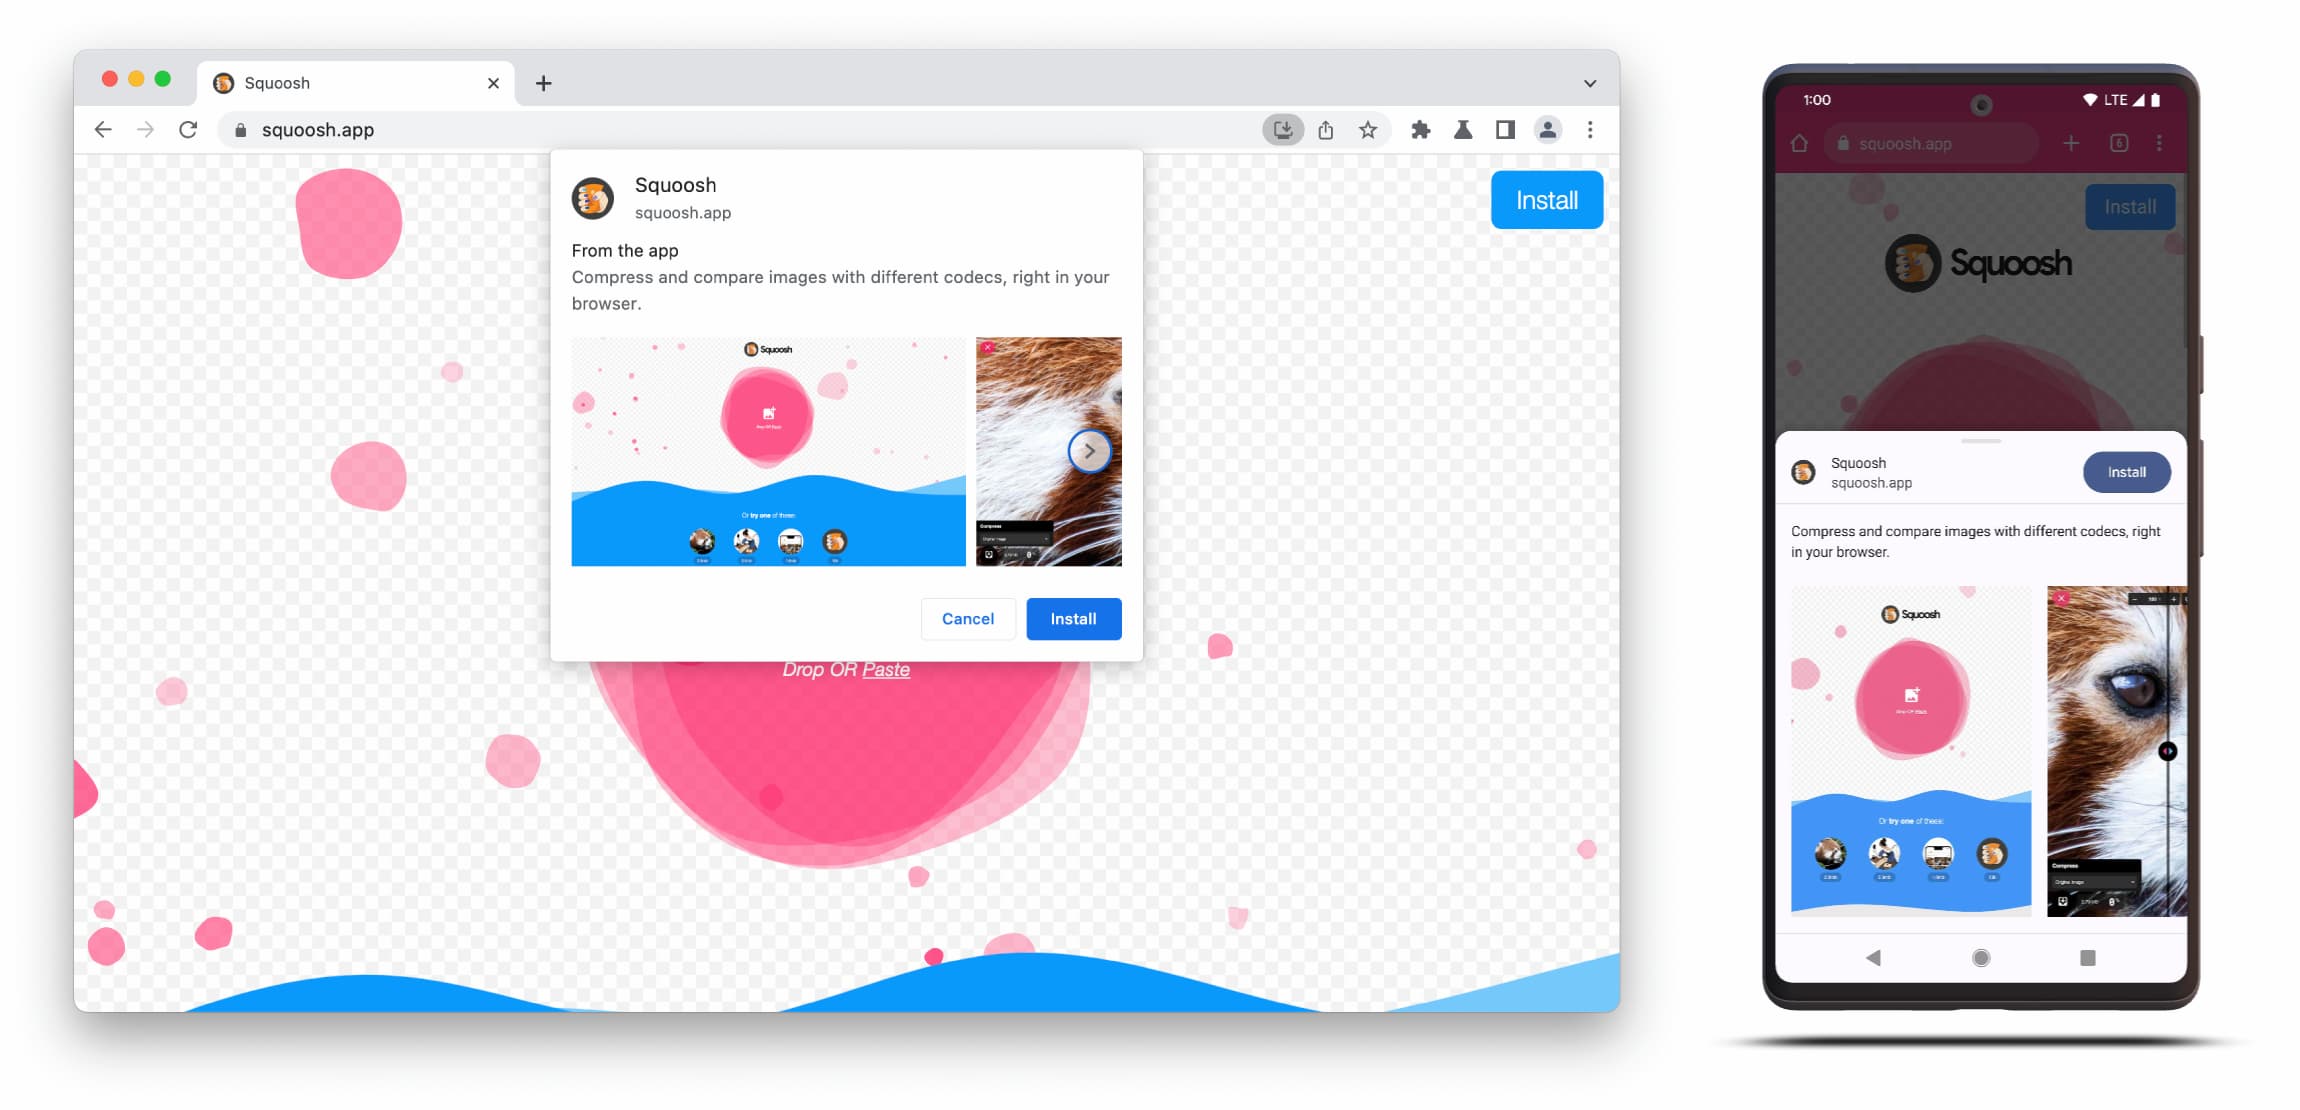
يتألّف مربّع حوار واجهة المستخدم Richer Install من محتويات الحقلَين description وscreenshots في بيان تطبيق الويب.
لتفعيل مربّع الحوار، ما عليك سوى إضافة لقطة شاشة واحدة على الأقل لعامل الشكل المقابل، ولكن يُنصح بإضافة الوصف أيضًا. في ما يلي تفاصيل هذَين الحقلَين.
لقطات الشاشة
تُضفي لقطات الشاشة فعلاً الجزء "الأفضل" على واجهة مستخدم التثبيت الجديدة، وننصحك بشدة باستخدامها. في البيان، يمكنك إضافة العضو screenshots الذي يأخذ صفيفًا يتطلّب صورة واحدة على الأقل، وسيعرض Chrome ما يصل إلى ثماني صور. في ما يلي مثال على ذلك.
 "screenshots": [
    {
     "src": "source/image1.png",
      "sizes": "640x320",
      "type": "image/png",
      "form_factor": "wide",
      "label": "Wonder Widgets"
    }
]
يجب أن تستوفي لقطات الشاشة المعايير التالية:
- يجب أن يكون العرض والارتفاع 320 بكسل على الأقل و3,840 بكسل على الأكثر.
- لا يمكن أن يكون الحد الأقصى للبعد أطول من الحد الأدنى للبعد بمقدار 2.3 مرة.
- يجب أن تكون نِسب العرض إلى الارتفاع متطابقة في جميع لقطات الشاشة التي تتضمّن قيمة عامل الشكل نفسها.
- تنسيقا الصور JPEG وPNG هما التنسيقان المتوافقان فقط.
- سيتم عرض ثماني لقطات شاشة فقط. إذا تمت إضافة المزيد، سيتجاهلها وكيل المستخدم ببساطة.
عليك أيضًا تضمين حجم الصورة ونوعها حتى يتم عرضها بشكلٍ صحيح.
يشير form_factor إلى المتصفّح ما إذا كان يجب أن تظهر لقطة الشاشة على أجهزة الكمبيوتر (wide) أو الأجهزة الجوّالة (narrow).
الوصف
يصف العضو description التطبيق في طلب التثبيت، وذلك لدعوة المستخدم إلى الاحتفاظ بالتطبيق.
سيظهر مربّع الحوار حتى بدون description، ولكن يُنصح بإضافته.
يتم تفعيل حد أقصى بعد 7 أسطر من النص (حوالي 324 حرفًا)، ويتم اقتطاع الأوصاف الأطول وإضافة علامة حذف.
{
…
"description": "Compress and compare images with different codecs
right in your browser."
}
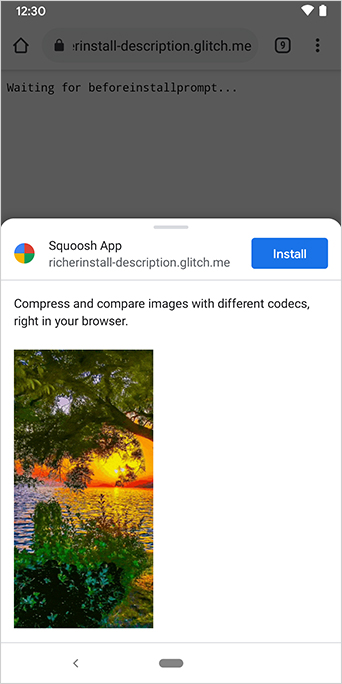
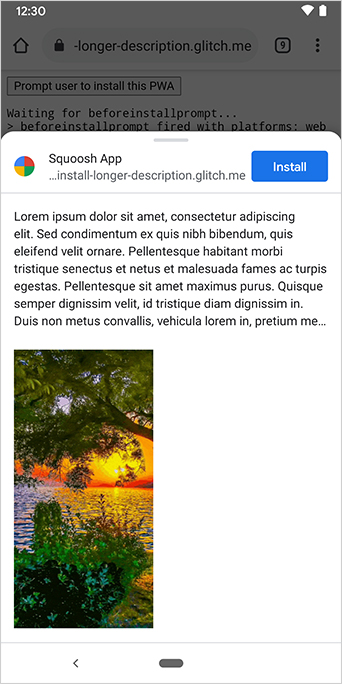
يظهر الوصف في أعلى طلب التثبيت.
ربما لاحظت من لقطات الشاشة أنّ مربّعات حوار التثبيت تسرد أيضًا مصدر التطبيق. يتم اقتطاع المصادر التي تكون طويلة جدًا بحيث لا تتسع لها واجهة المستخدم، ويُعرف ذلك أيضًا باسم الحذف، ويتم استخدامه كإجراء أمان لحماية المستخدمين.
مزيد من المعلومات
عرض توضيحي
HTML
<!DOCTYPE html>
<html lang="en">
  <head>
    <meta charset="utf-8" />
    <meta name="viewport" content="width=device-width, initial-scale=1" />
    <meta name="color-scheme" content="dark light" />
    <link rel="manifest" href="manifest.json" />
    <title>How to add Richer Install UI to your web app</title>
    <!-- TODO: Devsite - Removed inline handlers -->
    <!-- <script>
      if ('serviceWorker' in navigator) {
        window.addEventListener('load', () => {
          navigator.serviceWorker.register('sw.js');
        });
      }
    </script>
    <script type="module" src="script.js"></script> -->
  </head>
  <body>
    <h1>How to add Richer Install UI to your web app</h1>
    <ol>
      <li>
        Install the app by clicking the button below. After the installation,
        the button is disabled.
        <p>
          <button disabled type="button">Install</button>
        </p>
      </li>
      <li>
        When you click on install a dialog similar to the ones from app stores
        will be displayed.
      </li>
      <li>
        The dialog includes the `description` and `screenshots` set in the app
        manifest.
      </li>
      <li>
        Screenshots should be different depending if the app is being installed
        on a mobile or desktop device, according to the `form_factor` value set
        for the screenshots on the manifest
      </li>
    </ol>
  </body>
</html>
JS
        // The install button.
const installButton = document.querySelector('button');

// Only relevant for browsers that support installation.
if ('BeforeInstallPromptEvent' in window) {
  // Variable to stash the `BeforeInstallPromptEvent`.
  let installEvent = null;

  // Function that will be run when the app is installed.
  const onInstall = () => {
    // Disable the install button.
    installButton.disabled = true;
    // No longer needed.
    installEvent = null;
  };

  window.addEventListener('beforeinstallprompt', (event) => {
    // Do not show the install prompt quite yet.
    event.preventDefault();
    // Stash the `BeforeInstallPromptEvent` for later.
    installEvent = event;
    // Enable the install button.
    installButton.disabled = false;
  });

  installButton.addEventListener('click', async () => {
    // If there is no stashed `BeforeInstallPromptEvent`, return.
    if (!installEvent) {
      return;
    }
    // Use the stashed `BeforeInstallPromptEvent` to prompt the user.
    installEvent.prompt();
    const result = await installEvent.userChoice;
    // If the user installs the app, run `onInstall()`.
    if (result.outcome === 'accepted') {
      onInstall();
    }
  });

  // The user can decide to ignore the install button
  // and just use the browser prompt directly. In this case
  // likewise run `onInstall()`.
  window.addEventListener('appinstalled', () => {
    onInstall();
  });
}