
The layer model

Introduction
For most web developers the fundamental model of a web page is the DOM. Rendering is the often obscure process of turning this representation of a page into a picture on the screen. Modern browsers have changed the way rendering works in recent years to take advantage of graphics cards: this is often vaguely referred to as “hardware acceleration”. When talking about a normal web page (i.e. not Canvas2D or WebGL), what does that term really mean? This article explains the basic model that underpins hardware accelerated rendering of web content in Chrome.
Big, Fatty Caveats
We’re talking about WebKit here, and more specifically we’re talking about the Chromium port of WebKit. This article covers implementation details of Chrome, not web platform features. The web platform and standards don’t codify this level of implementation detail, so there are no guarantees anything in this article will apply to other browsers, but knowledge of internals can nevertheless be useful for advanced debugging and performance tuning.
Also, note that this entire article is discussing a core piece of Chrome’s rendering architecture that’s changing very fast. This article attempts to cover only stuff that’s unlikely to change, but no guarantees that it’ll all still apply in six months.
It’s important to understand that Chrome has had two different rendering paths for a while now: the hardware-accelerated path and the older software path. As of this writing all pages go down the hardware accelerated path on Windows, ChromeOS, and Chrome for Android. On Mac and Linux only pages that need compositing for some of their content go down the accelerated path (see below for more on what would require compositing), but soon all pages will go down the accelerated path there, too.
Lastly, we’re peeking under the hood of the rendering engine and looking at features of it that have a big impact on performance. When trying to improve the performance of your own site it can be helpful to understand the layer model, but it’s also easy to shoot yourself in the foot: layers are useful constructs, but creating lots of them can introduce overhead throughout the graphics stack. Consider yourself forewarned!
From the DOM to the Screen
Introducing Layers
Once a page is loaded and parsed, it's represented in the browser as a structure many web developers are familiar with: DOM. When rendering a page, however, the browser has a series of intermediate representations that aren’t directly exposed to developers. The most important of these structures is a layer.
In Chrome there are actually several different types of layers: RenderLayers, which are responsible for subtrees of the DOM, and GraphicsLayers, which are responsible for subtrees of RenderLayers. The latter is most interesting to us here, because GraphicsLayers are what get uploaded to the GPU as textures. I’ll just say “layer” from here on out to mean GraphicsLayer.
Quick aside on GPU terminology: what’s a texture? Think of it as a bitmap image that’s moved from main memory (i.e. RAM) to video memory (i.e. VRAM, on your GPU). Once it’s on the GPU, you can map it to a mesh geometry -- in video games or CAD programs, this technique is used to give skeletal 3D models “skin.” Chrome uses textures to get chunks of web page content onto the GPU. Textures can be cheaply mapped to different positions and transformations by applying them to a really simple rectangular mesh. This is how 3D CSS works, and it’s also great for fast scrolling -- but more on both of these later.
Let’s look at a couple examples to illustrate the layer concept.
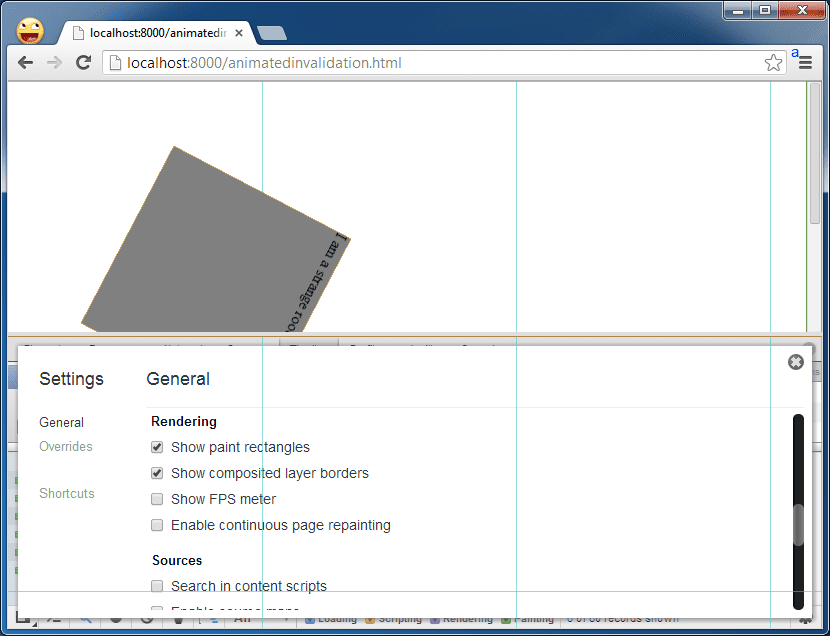
A very useful tool when studying layers in Chrome is the “show composited layer borders” flag in the settings (i.e. little cog icon) in Dev Tools, under the “rendering” heading. It very simply highlights where layers are on-screen. Let’s turn it on. These screenshots and examples are all taken from the latest Chrome Canary, Chrome 27 at the time of this writing.
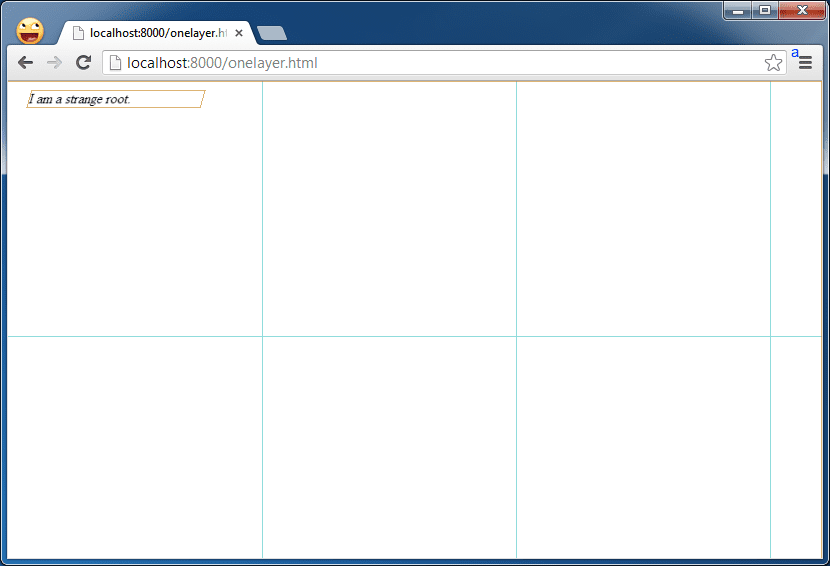
Figure 1: A single-layer page
<!doctype html>
<html>
<body>
  <div>I am a strange root.</div>
</body>
</html>

This page has just one layer. The blue grid represents tiles, which you can think of as sub-units of a layer that Chrome uses to upload parts of a large layer at a time to the GPU. They aren’t really important here.
Figure 2: An element in its own layer
<!doctype html>
<html>
<body>
  <div style="transform: rotateY(30deg) rotateX(-30deg); width: 200px;">
    I am a strange root.
  </div>
</body>
</html>
By putting a 3D CSS property on the <div> that rotates it, we can see what it looks like when an element gets its own layer: note the orange border, which outlines a layer in this view.
Layer Creation Criteria
What else gets its own layer? Chrome’s heuristics here have evolved over time and continue to, but currently any of the following trigger layer creation:
- 3D or perspective transform CSS properties
<video>elements using accelerated video decoding<canvas>elements with a 3D (WebGL) context or accelerated 2D context- Composited plugins (i.e. Flash)
- Elements with CSS animation for their opacity or using an animated transform
- Elements with accelerated CSS filters
- Element has a descendant that has a compositing layer (in other words if the element has a child element that’s in its own layer)
- Element has a sibling with a lower z-index which has a compositing layer (in other words the it’s rendered on top of a composited layer)
Practical Implications: Animation
We can move layers around, too, which makes them very useful for animation.
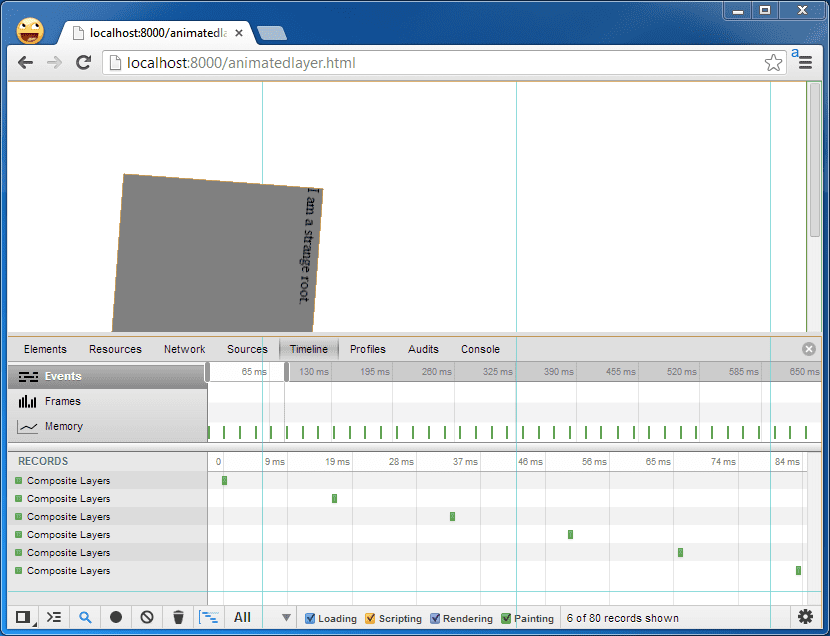
Figure 3: Animated Layers
<!doctype html>
<html>
<head>
  <style>
  div {
    animation-duration: 5s;
    animation-name: slide;
    animation-iteration-count: infinite;
    animation-direction: alternate;
    width: 200px;
    height: 200px;
    margin: 100px;
    background-color: gray;
  }
  @keyframes slide {
    from {
      transform: rotate(0deg);
    }
    to {
      transform: rotate(120deg);
    }
  }
  </style>
</head>
<body>
  <div>I am a strange root.</div>
</body>
</html>
As mentioned earlier, layers are really useful for moving around static web content. In the basic case, Chrome paints the contents of a layer into a software bitmap before uploading it to the GPU as a texture. If that content doesn’t change in the future, it doesn’t need to be repainted. This is a Good Thing: repainting takes time that can be spent on other stuff, like running JavaScript, and if the paint is long it causes hitches or delays in animations.
See, for instance, this view of Dev Tools timeline: there are no paint operations while this layer is rotating back and forth.
Invalid! Repainting
But if the layer’s content changes, it has to be repainted.
Figure 4: Repainting Layers
<!doctype html>
<html>
<head>
  <style>
  div {
    animation-duration: 5s;
    animation-name: slide;
    animation-iteration-count: infinite;
    animation-direction: alternate;
    width: 200px;
    height: 200px;
    margin: 100px;
    background-color: gray;
  }
  @keyframes slide {
    from {
      transform: rotate(0deg);
    }
    to {
      transform: rotate(120deg);
    }
  }
  </style>
</head>
<body>
  <div id="foo">I am a strange root.</div>
  <input id="paint" type="button" value="repaint">
  <script>
    var w = 200;
    document.getElementById('paint').onclick = function() {
      document.getElementById('foo').style.width = (w++) + 'px';
    }
  </script>
</body>
</html>
Every time the input element is clicked the rotating element gets 1px wider. This causes relayout and repainting of the entire element, which in this case is an entire layer.
A good way to see what’s getting painted is with the “show paint rects” tool in Dev Tools, also under the “Rendering” heading of Dev Tools’ settings. After turning it on, notice that the animated element and the button both flash red when the button is clicked.
The paint events show up in the Dev Tools timeline, too. Sharp-eyed readers might notice there are two paint events there: one for the layer, and one for the button itself, which gets repainted when it changes to/from its depressed state.
Note that Chrome doesn’t always need to repaint the entire layer, it tries to be smart about only repainting the part of the DOM that’s been invalidated. In this case, the DOM element that we modified is the size of the entire layer. But in many other cases, there will be lots of DOM elements in a layer.
An obvious next question is what causes an invalidation and forces a repaint. This is tricky to answer exhaustively because there are a lot of edge cases that can force invalidations. The most common cause is dirtying the DOM by manipulating CSS styles or causing relayout. Tony Gentilcore has a great blog post on what causes relayout, and Stoyan Stefanov has an article that covers painting in more detail (but it ends with just painting, not this fancy compositing stuff).
The best way to figure out if its affecting something you’re working on is to use the Dev Tools Timeline and Show Paint Rects tools to see if you’re repainting when you wish you weren’t, then try to identify where you dirtied the DOM right before that relayout/repaint. If painting is inevitable but seems to be taking unreasonably long, check out Eberhard Gräther’s article on continuous painting mode in Dev Tools.
Putting it together: DOM to Screen
So how does Chrome turn the DOM into a screen image? Conceptually, it:
- Takes the DOM and splits it up into layers
- Paints each of these layers independently into software bitmaps
- Uploads them to the GPU as textures
- Composites the various layers together into the final screen image.
That all needs to happen the first time Chrome produces a frame of a web page. But then it can take some shortcuts for future frames:
- If certain CSS properties change, it isn’t necessary to repaint anything. Chrome can just recomposite the existing layers that are already sitting on the GPU as textures, but with different compositing properties (e.g. in different positions, with different opacities, etc).
- If part of a layer gets invalidated, it gets repainted and re-uploaded. If its content remains the same but its composited attributes change (e.g. it gets translated or its opacity changes), Chrome can leave it on the GPU and recomposite to make a new frame.
As should now be clear, the layer-based compositing model has deep implications for rendering performance. Compositing is comparably cheap when nothing needs to be painted, so avoiding repaints of layers is a good overall goal when trying to debug rendering perf. Savvy developers will take a look at the list of compositing triggers above and realize that its possible to easily force the creation of layers. But beware just blindly creating them, as they’re not free: they take up memory in system RAM and on the GPU (particularly limited on mobile devices) and having lots of them can introduce other overhead in the logic keeps track of which are visible. Many layers can also actually increase time spent rasterizing if they layers are large and overlap a lot where they didn’t previously, leading to what’s sometimes referred to as “overdraw”. So use your knowledge wisely!
That’s all for now. Stay tuned for a couple more articles on practical implications of the layer model.